
If you want to understand what is harness engineering in AI, start with one simple observation. The same AI model can act like a careless intern in one setup and like a dependable engineer in another. The model did not change. The system around it did. Harness engineering is the skill of designing that system, and in 2026 it has become one of the most talked-about skills in the world of AI agents.
An AI agent is a model that can take actions. It can read files, run commands, search the web, call other software, and keep working through a task without you typing every next step. That makes agents useful, and it also makes them risky. An agent can edit the wrong file, skip the tests, run the same failing command forty times, forget what it did yesterday, or tell you a job is finished when it is broken. A better prompt fixes very few of those problems. The real fixes sit in the instructions, context, tools, sandboxes, permissions, memory, tests, logs, loops, and human approval points around the model. Together, those parts form the harness.
The term took off in February 2026. Mitchell Hashimoto, the co-founder of HashiCorp, wrote about fixing every agent mistake so it could never happen again, and a few days later OpenAI described how a small team shipped a product with roughly a million lines of code and no code written by hand. LangChain then summed up the whole idea in a formula you will see again and again in this guide: Agent = Model + Harness.
In this guide, you will learn what an agent harness is, where the term came from, what the newest 2026 data says, and how harness engineering vs prompt engineering vs context engineering compares. You will see every part of a harness explained in plain language, the five reasons agents fail and how to fix each one, how to write an AGENTS.md file, the best book and courses to learn the skill, a step-by-step roadmap, a 30-day plan, portfolio projects, and career paths. If you are new to AI agents, read from the top. If you already use coding agents such as Claude Code or Codex, you can jump straight to the components, the latest data, and the failure patterns.
What Is Harness Engineering in AI?
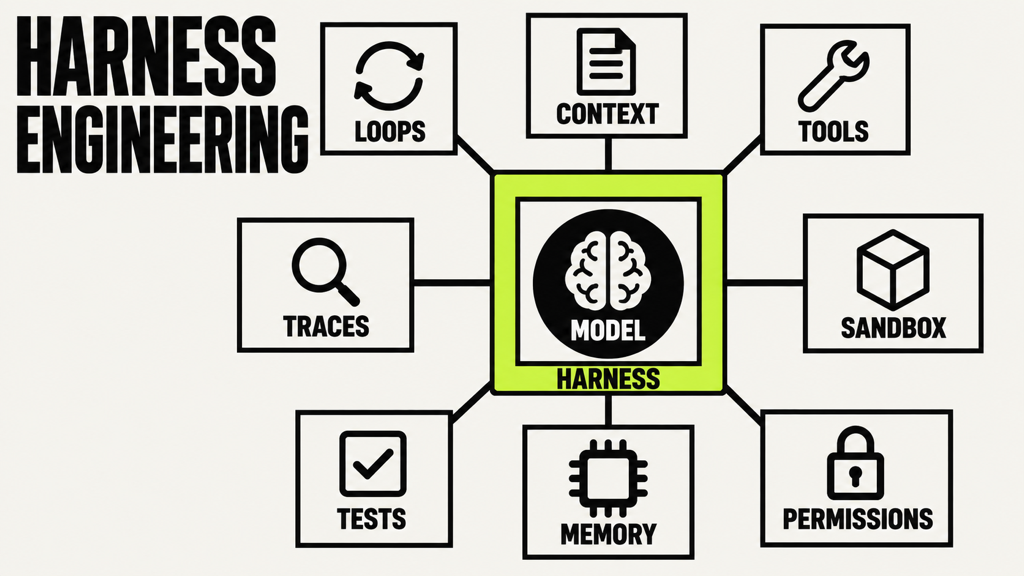
Harness engineering is the practice of designing the system around an AI agent so the agent has the information, tools, environment, limits, feedback, and controls it needs to do useful work reliably. The model does the thinking. The harness decides what the model sees, what it can do, where it can do it, what stops it, and how you check whether its work is correct. So when people talk about harness engineering in AI, they mean all the engineering that goes into everything except the model itself.
The word comes from an everyday object. A harness is the equipment that connects a horse to a cart or a plow. The horse brings the strength, and the harness turns that strength into useful work. It attaches the horse to the load, lets the driver steer, and keeps all that power pointed in the right direction. A strong horse without a harness can still run, but it cannot plow a straight line. Software engineers also use the word in another way: a test harness is code that runs other code under controlled conditions and checks the results. Both meanings fit AI agents. The model is the strong horse, and the harness points its power at real work, keeps it within limits, and checks what it produces.
Here is what that looks like in practice. Say you ask a coding agent to add a weekly streak feature to a habit-tracker app, so users can see how many weeks in a row they hit their goal. With a bare setup, the agent reads your request, writes some code, and tells you it is done. Maybe the code works. Maybe it counts weeks from Sunday in one file and from Monday in another, breaks for users in other time zones, and was never tested. Now give the same model a proper harness. It receives your project’s rules, works in a separate copy of the code, can edit only the source and test folders, gets the tests run automatically after every change, sees the failures, keeps fixing until the checks pass, and opens a pull request that you approve before anything goes live. Every step gets recorded. Same model, very different result.
That gap is why harness engineering has become its own skill. As models got better, the hard question changed. It used to be whether a model could write a working function. Now it is whether you can trust what the model produces, get the same good result a thousand times, keep the agent inside safe limits, and see exactly what happened when something goes wrong. Harness engineering answers those questions. It includes prompt engineering and context engineering, and it goes much further, into tools, environments, permissions, memory, verification, monitoring, and control.
What Is an Agent Harness? Agent = Model + Harness Explained
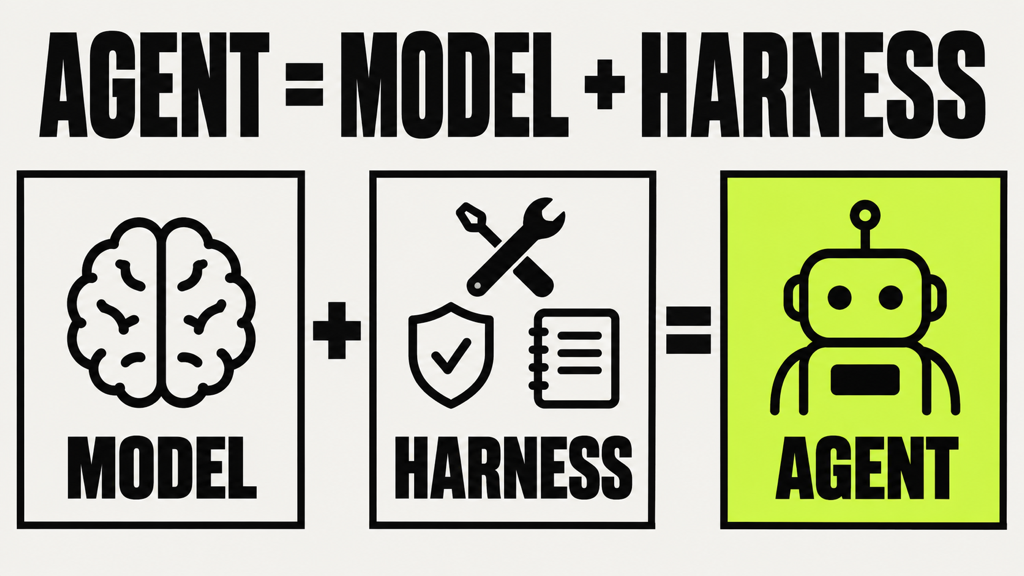
An agent harness is the complete system around an AI model that turns it into a working agent. It includes the instructions and context the model receives, the tools it can use, the workspace where it acts, the permissions that limit it, the memory that carries its progress, the tests and checks that judge its work, the records of what happened, and the loops and human approval points that control it.
LangChain made this idea popular with a simple formula, Agent = Model + Harness, and an even simpler rule: “If you’re not the model, you’re the harness.” Everything in an agent system that is not the model belongs to the harness. That covers the system prompt, the tool definitions, the files the agent can reach, the sandbox, the logic that runs the loop, and the automatic checks. The model brings the intelligence. The harness makes that intelligence useful.
The formula makes sense once you see what a model cannot do on its own. A large language model takes in text, sometimes images or audio, and writes text back. It cannot remember anything between requests. It cannot run code. It cannot see anything that happened after its training unless someone shows it. It cannot set up an environment or install the software a task needs. Every one of those abilities has to come from outside the model. A model only becomes an agent when something gives it a loop, tools, and a way to see the results of its actions, and that something is already a small harness. A helpful way to picture the progression is Model, then Agent, then Harness, then Reliable Agent System. A basic harness turns a model into an agent. A well-built harness turns an agent into something you can depend on.
The harness surrounds the model completely: every path into the model and every path out of it goes through the harness. On the way in, the harness builds the context for each model call and picks which instructions, documents, memories, tools, and earlier results the model sees. On the way out, the model only writes text, and some of that text is a request to use a tool. The model never edits a file or calls an API by itself. The harness reads each request, decides whether to allow it, runs it if allowed, records what happened, and hands the result back. When the habit-tracker agent asks to edit the streak file, the harness checks that the file is in an allowed folder, applies the edit in a safe copy of the project, formats the code, sends back a summary, and logs the action. To the model, that is one request and one answer. Everything that made the action safe and traceable happened in the harness.
Birgitta Böckeler of Thoughtworks makes a useful point here: part of the harness already comes built into coding agents such as Claude Code, Codex, and Cursor, including their system prompt, their way of finding relevant code, and their loop. Around that built-in harness, you build an outer harness for your own project, with instruction files, tests, linters, custom checks, and permission settings. So harness engineering is for people who use agents as much as for people who build them. If you use a coding agent every day, you are already doing some harness engineering, whether you call it that or not.
Agent Harness vs Agent Framework vs Agent Scaffolding
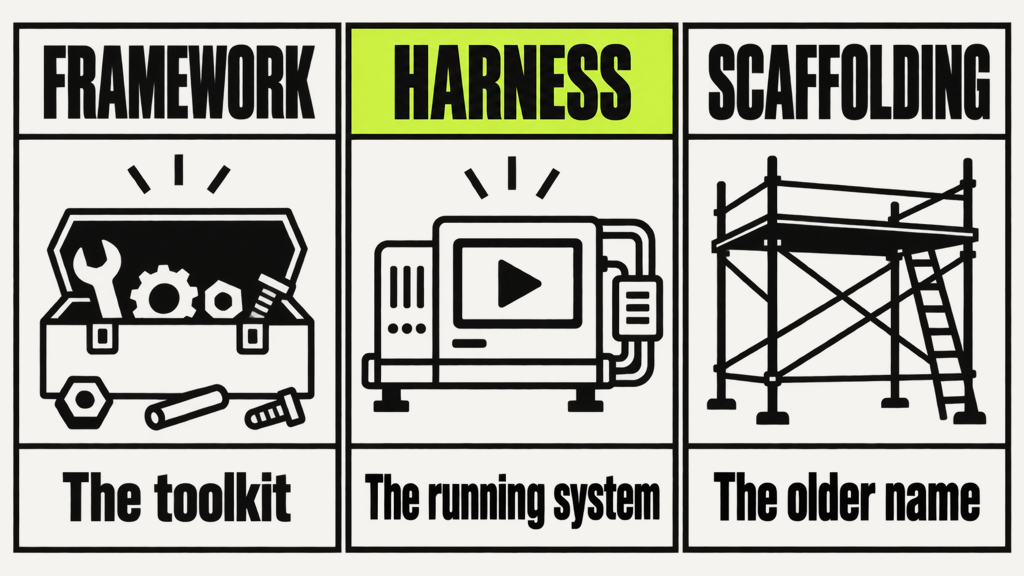
An agent framework is a toolkit you build agents with, an agent harness is the running system around a specific agent, and agent scaffolding is an older name for roughly the same thing as a harness. These three terms show up together in search results and job posts, and the difference starts to matter once you pick tools.
A framework gives you building blocks: a loop, tool handling, memory, saved progress, and ways to connect steps. LangGraph, the OpenAI Agents SDK, Google’s Agent Development Kit, CrewAI, and AutoGen are all frameworks. Nothing happens until you put the pieces together with your own code. A harness is what you end up with after you do that, or what a product such as Claude Code or Codex gives you ready to run. It is the configured system that calls the model, runs its tools, applies its permissions, stores its progress, records what it did, and decides when to stop. A framework can supply part or all of a harness, and most real systems mix framework pieces with the team’s own rules.
Agent scaffolding is the word researchers used before “harness” caught on, especially in benchmark papers that test one model inside different scaffolds. Some writers now split the two, using scaffolding for the parts the model reads, such as the system prompt and tool descriptions, and harness for the loop and controls around it. For everyday purposes, you can treat them as near-synonyms and focus on what the system does. You may also see the word runtime, which is narrower still: it is the engine underneath a harness that keeps the process running, schedules the steps, and restarts after a crash.
The practical advice is simple. Use a framework when you need to build a custom agent. Use a ready-made agent such as Claude Code when it fits your task. Either way, design the outer harness yourself, because the instructions, permissions, checks, and approval points belong to your project and nobody else’s.
Where Did the Term Harness Engineering Come From?
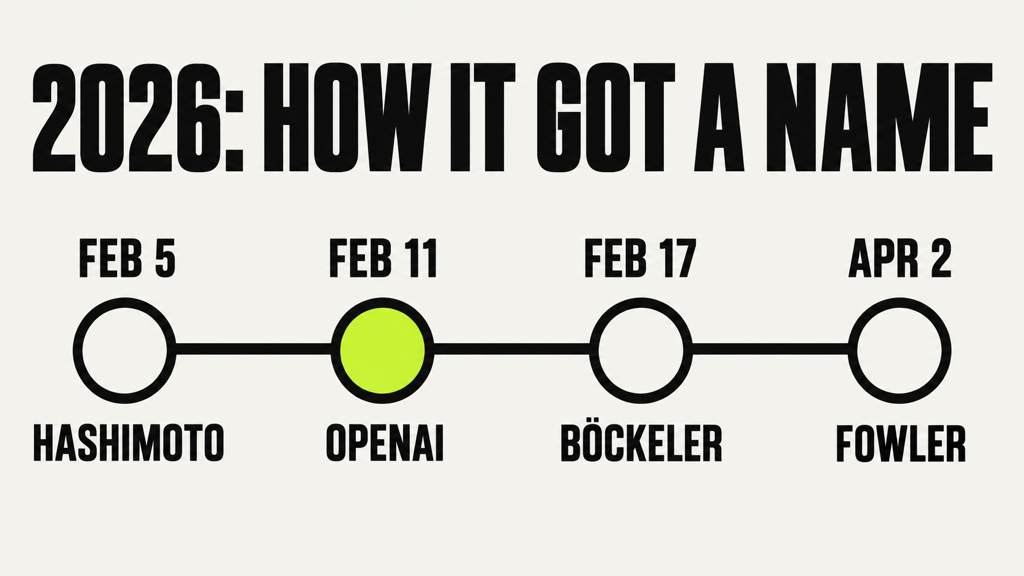
The ideas behind harness engineering are much older than the name. Software teams have used retries, tests, sandboxes, permissions, and logs for decades, and agent builders were using all of them before anyone called the combination harness engineering. What changed in early 2026 was that several well-known engineers and companies described the same shift within a few days of each other, and the name stuck.
In February 2026, Mitchell Hashimoto wrote about how he went from doubting AI coding tools to using agents every day. One stage of his journey was engineering the harness, which he described as the habit of responding to every agent mistake by taking the time to “engineer a solution such that the agent never makes that mistake again.” In practice, he did two things. He updated the instruction file the agent reads at the start of its work, and he built small tools, such as scripts that run a focused set of tests or take screenshots, so the agent could check its own results.
On February 11, 2026, OpenAI shared the story of an internal experiment. A small team spent five months building and shipping a real product without writing any code by hand. Codex agents wrote the application logic, the tests, the build setup, and the documentation, and the codebase grew to roughly a million lines. The team summed it up as “Humans steer. Agents execute.” The engineers spent their time designing the environment, describing what they wanted, and building feedback loops that let the agents do reliable work. When something failed, they did not tell the agent to try harder. They asked what was missing from the agent’s environment and added it.
Other teams pushed the idea forward in the same months. LangChain showed that changing only the harness moved its coding agent from 52.8 percent to 66.5 percent on the Terminal Bench 2.0 benchmark, from outside the top thirty to the top five, with the same model. Anthropic explained how it kept agents making steady progress across many sessions. Birgitta Böckeler described harness engineering as a way to trust what coding agents produce, so they can work with less supervision. The details differed, and the direction was the same: more and more engineering effort now goes into everything around the model.
The vocabulary is still young, so expect some variation. No official body defines harness engineering, and people draw its edges in slightly different places. Some say agent scaffolding. Some use “harness” only for the runtime around the model, while others include the whole development process. This guide sticks to one definition, the one at the top, so you have a stable reference while the language online keeps shifting.
Why Harness Engineering Matters in 2026
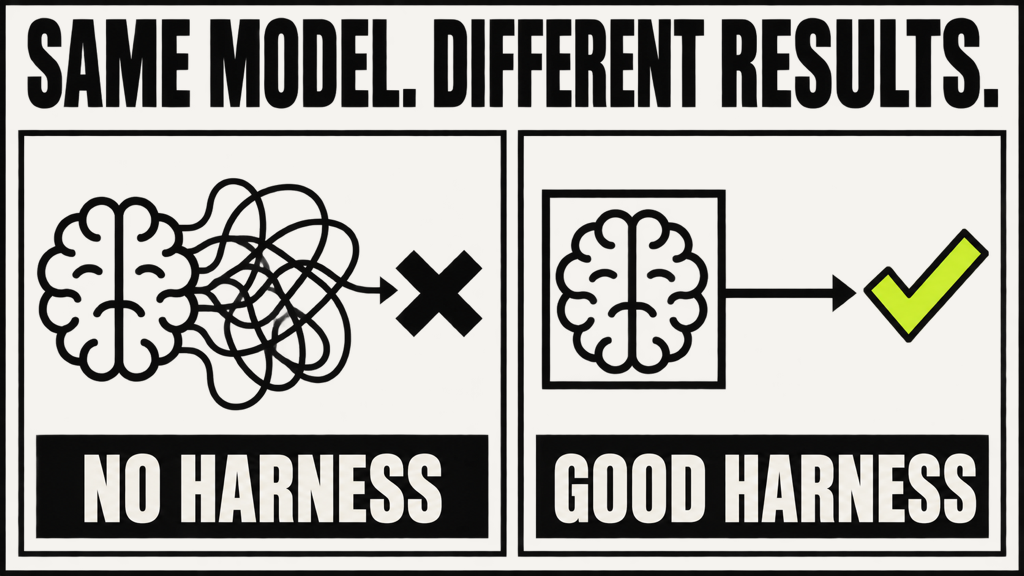
Harness engineering matters because it is the part of an AI agent you can improve today, and it often changes results more than switching models. LangChain’s benchmark jump is the clearest public example: the same model, in a better harness, went from outside the top thirty to the top five. Keep that in mind whenever you compare agents. You are always judging a model and a harness together, and public leaderboards show a model inside someone else’s harness.
Agents also behave differently from normal software. A calculator app gives the same answer to the same sum every time. An agent is non-deterministic, which means the same request can produce different results on different runs. Give an agent the same task twice and it may take different paths, use different tools, and write different code. Watching it succeed once proves very little. You need a system that checks the work every single time, catches the mistakes, and makes the good result the normal result. That system is the harness.
Mistakes also compound. An agent works through many steps, and each step builds on the ones before it. One small early mistake, such as getting the first day of the week wrong, can quietly shape every decision after it. Even if each step only has a small chance of going wrong, the chance that a long chain of steps goes perfectly drops fast. That is why a good harness runs quick tests after every edit, checks the final result before the agent can claim success, and saves progress so a bad step can be undone.
Then there is risk. An agent with tools can change real systems. A coding agent can delete files or run a database change against the live database. A support agent can issue refunds. A research agent that reads web pages can be tricked by instructions hidden inside those pages. You cannot rely on the model to police itself, because models can be confused, manipulated, or wrong. Permissions, sandboxes, guardrails, and approval gates in the harness set limits that hold even when the model makes a bad call.
Finally, it matters for your career. Companies are moving from AI demos to AI systems that do real work every day, and nearly everything between the two is harness work. Anthropic’s engineers found, while taking their research agent from prototype to production, that for agents “the last mile often becomes most of the journey.” The people who can build that last mile are the people companies want to hire.
Harness Engineering in 2026: What the Latest Data Shows
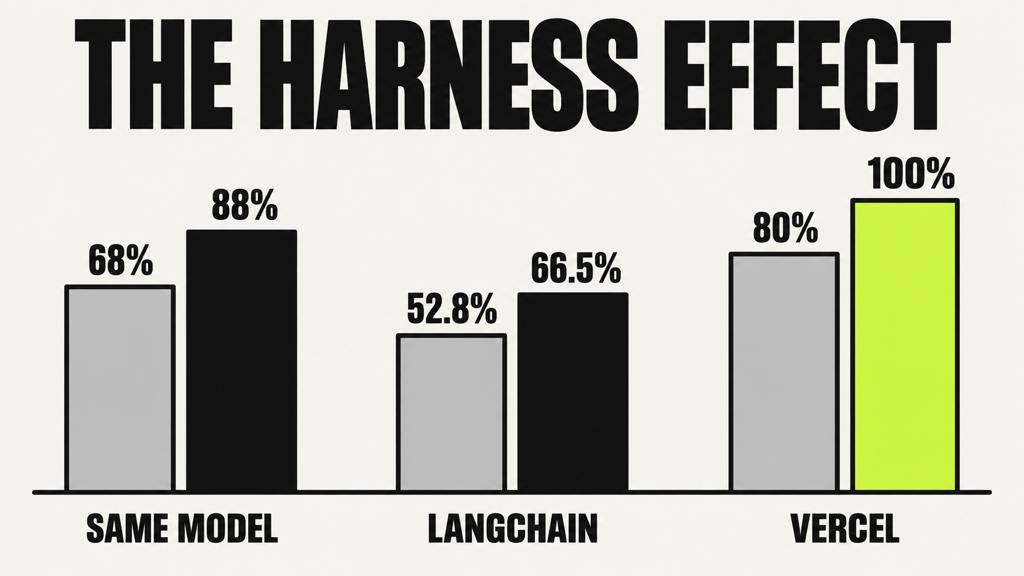
The newest numbers tell a clear story: the harness changes results a lot, and most teams still build theirs by guesswork. In September 2026, the software studio Marmelab audited 246 open-source repositories and 57 publications about coding-agent harnesses. It is the most detailed look so far at what people do in practice, as opposed to what they say they do.
The first finding shows why the field exists. In one experiment the audit cites, the same model ran inside eight different harnesses on the same 25 tasks, with the same provider and the same tools, and its success rate ranged from 68 percent to 88 percent. That is a 20-point swing from the system around the model alone. Add LangChain’s Terminal Bench result and you see a pattern: keep the model the same, change the harness, and scores move by amounts you would normally expect from a whole new model generation.
The second finding is less flattering. Among 145 large open-source projects, including Rails, React, Kubernetes, and Django, 63 percent ship an instruction file for agents, yet only 4 set up a subagent and the whole group has just 14 hooks between them. Out of 391 repositories, only 12 include even one rule that blocks an action in Claude Code. Across 481 public CLAUDE.md files, only 4.4 percent of the security rules are backed by a real control, which means the rest are just sentences the model may or may not follow. And out of 97 harnesses big enough to test, 60 percent have no tests and no evaluations at all. In short, teams write lots of instructions and rarely enforce or measure them.
Instruction files also tend to grow too long. OpenAI’s team settled on a main AGENTS.md of about 100 lines, yet 57 percent of the main instruction files in the audit are longer than that, with a median of 123 lines. AGENTS.md is also becoming the standard: 189 of the repositories keep an AGENTS.md at the top of the project against 155 with a CLAUDE.md, and in the large projects, 36 of the 53 CLAUDE.md files just redirect to AGENTS.md.
The most useful results are about what does not work. Vercel removed 80 percent of the tools from one of its agents and its success rate rose from 80 percent to 100 percent on the same model, while token use fell by more than half and each task dropped from 724 seconds to 141. One research paper tested harness parts one at a time and found that adding a second reviewer agent lowered the success rate by 8 percent. A study of 113 people supervising an agent found that writing permission rules in advance blocked 20.1 percentage points fewer bad actions than approving each action as it came, largely because people approved 93 percent of the pop-up requests anyway. And instruction files written by an AI model did worse than having no file at all while costing over 20 percent more, whereas files written by people improved results by about 4 percent.
For you, this adds up to three practical lessons that shape the rest of this guide. Fewer tools and shorter instruction files often work better than more of each. Rules that matter belong in code that enforces them, such as a blocking rule, a hook, or a sandbox limit. And a harness nobody tests is just a guess, no matter how carefully you wrote its instructions.
Harness Engineering vs Prompt Engineering vs Context Engineering
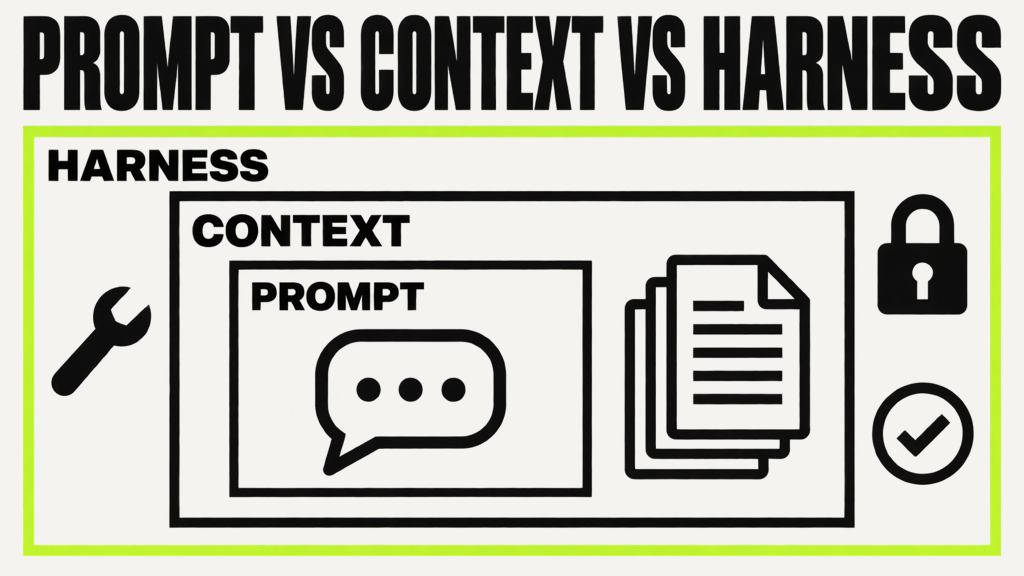
Prompt engineering is about what you tell the model. Context engineering is about what the model knows when it acts. Harness engineering is about the whole system that makes the agent’s work trustworthy, and it contains the other two. Picture three nested boxes: the prompt sits inside the context, the context sits inside the harness, and the harness wraps the model, the loop, and every check around them.
Prompt engineering is writing and organizing instructions so a model gives you the result you want, consistently. It covers the goal, the instructions, the limits, examples (often called few-shot prompting), and the format you want back. For the habit tracker, it is the difference between “add a weekly streak” and a clear brief that explains what a weekly streak means for this product, says a week runs Monday to Sunday in the user’s time zone, asks the agent to follow the existing code style, and tells it to run the tests before saying it is done. The limit is that a prompt only controls words. It cannot hand the model a file it never saw, run a test, or stop the agent from editing a folder it can reach. If you want to master this first layer, start with how to become a prompt engineer, because every other layer builds on it.
Context engineering widens the view from the instructions to everything the model sees. The context window is the maximum amount of text, measured in tokens, a model can consider at once. It holds the instructions, the conversation so far, documents, code, tool descriptions, and tool results. Context engineering is deciding what goes into that space, what stays out, and how it changes as a task goes on. Anthropic treats context as a limited resource: the more you pile in, the harder it becomes for the model to focus on what matters. For an agent, this happens on every model call, because the harness builds a fresh context each time. You can learn context engineering step by step, including RAG, embeddings, and memory, before you move up to the harness.
Harness engineering includes both and adds everything else an agent needs to work reliably: tools and their permissions, the sandbox where the agent works, the saved state that survives interruptions, the tests and evaluations that judge its work, the logs that record it, the loop that decides when to continue or stop, and the approval points that keep people in charge. A simple way to remember it: prompt engineering works on one message, context engineering works on one model call or session, and harness engineering works on the whole system.
None of these layers replaces another, whatever you read online. You will see posts claiming prompt engineering is dead or that one new term killed another. Those posts get clicks and teach you very little. A strong harness still needs clear instructions, and a well-built loop still needs each model call to get the right context. Prompt engineering does not disappear inside a harness. It spreads through it, into tool descriptions, instruction files, handoff messages, and the feedback the loop sends back to the agent.
The Six Engineering Layers Behind AI Agents
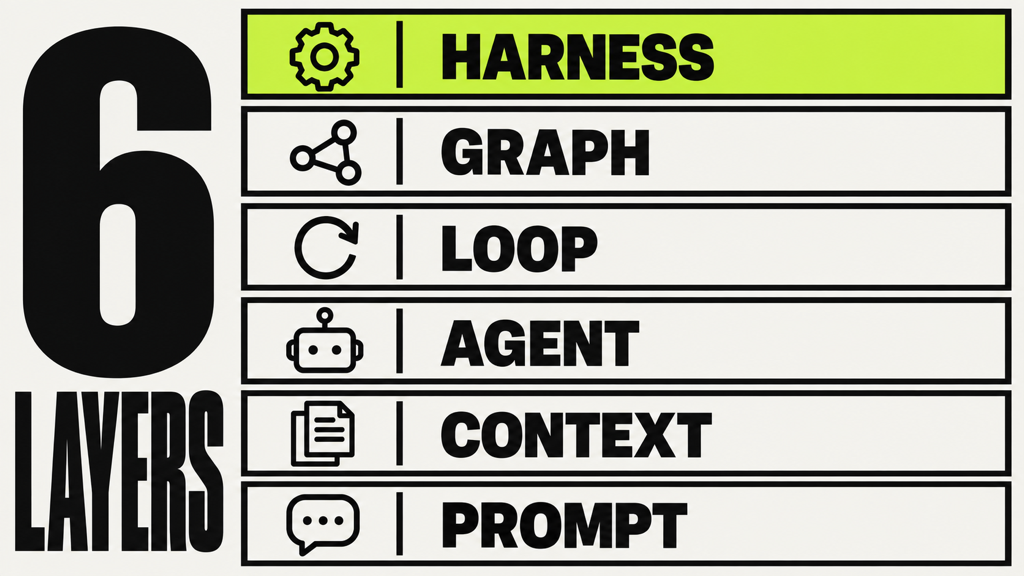
Harness engineering sits at the top of a family of related terms that people usually search for together: prompt, context, agent, loop, graph, and harness engineering. They came from different communities at different times, and some are only months old. The easiest way to understand them is as a ladder, where each layer handles a problem the layer below it could not.
1. Prompt Engineering: How You Tell the Model What You Want
Prompt engineering is the oldest layer. It took off after ChatGPT launched in late 2022, when millions of people noticed that the same model could give a vague answer or an excellent one depending on how they asked. Anthropic suggests treating the model like a brilliant new employee who does not yet know how your team works. A new hire can be very capable and still get things wrong from a one-line request, because they fill every gap with a reasonable guess, and some guesses will be wrong. Every part of a good prompt, from the goal to the limits to the examples, removes one of those guesses.
2. Context Engineering: What the Model Knows When It Acts
Context engineering became popular in 2025. It covers the information around the instructions: which files, documents, memories, and tool results the model sees, and when it sees them. It also deals with the problems that show up when context grows. Context rot is when a model gets worse at using information as more and more text piles up. Context poisoning is when a mistake, such as a made-up fact, gets into the context and the model keeps building on it. Context clash is when two pieces of context disagree, such as an old document and a new specification. The two main fixes are compaction, which summarizes a context that is getting full, and a context reset, which starts the model fresh with only what it needs.
3. Agent Engineering: Building, Testing, and Improving the Agent
LangChain describes agent engineering as the ongoing work of turning unpredictable AI systems into reliable products, through a repeating cycle of building, testing, shipping, watching, and improving. It differs from the other layers because it runs across all of them. It is the habit of improving whatever system you have based on how it behaves with real users. The habit-tracker agent might pass your tests and still fail in real use, because real users have habits that run for months, live in time zones you never tested, or store data in ways your samples did not. Agent engineering is the cycle that finds and fixes those gaps. You may also see the term agentic engineering, which means something slightly different: using engineering skill to direct AI agents while you build software with them.
4. Loop Engineering: Keeping the Work Moving Without a Human Prompt
Loop engineering is one of the newest labels, and it spread quickly in mid-2026. IBM defines loop engineering as designing loops that guide AI agents toward a goal with minimal human input. In most setups today, a person sits next to the agent, reads its output, and types the next instruction: run the tests, fix that error, update the docs. Loop engineering replaces that person with a designed system of triggers, goals, checks, memory, and limits. Addy Osmani, an engineer and author, puts it in terms of your job: you stop being the person who prompts the agent and start designing the system that prompts it for you. You will find a full section on loops later in this guide.
5. Graph Engineering: Organizing Complex Work Into Connected Steps
Graph engineering handles work with more structure than one loop can hold. A graph describes a process as steps, called nodes, joined by paths, called edges. Some paths have conditions, so the work can branch. A bigger version of the habit-tracker task might start with a planning step, pass the plan to a building step, then to a testing step, and then branch: if the tests pass, the work moves to review, and if they fail, it goes back to building along with the error. Tools such as LangGraph and Google’s Agent Development Kit have organized agents this way for a while. The label graph engineering is much newer, and people use it loosely, sometimes even for knowledge graphs, which are a different idea about storing facts. In this guide, graph engineering means designing agent workflows as connected steps.
6. Harness Engineering: The Whole System Around the Agent
Harness engineering brings the other five together. The harness holds the instructions and context, runs the loop, wraps the graph, and adds the environment, permissions, saved state, checks, records, and human controls that no other layer gives you on its own. It covers the biggest job of the six, which is building a whole system you can trust with real work.
7. How the Six Layers Help You Find Problems
These layers are more than vocabulary. They tell you where to look when something breaks. If the agent misunderstands what a weekly streak means, the problem is in the prompt, so write clearer instructions. If it ignores your project’s rules because it never saw them, the problem is in the context. If it passes your tests and fails with real users, you need the agent engineering cycle of wider testing and watching. If it stops too early or repeats the same failing action, the loop needs clearer goals and stop rules. If a task has distinct stages with different paths depending on the outcome, a graph may fit better than one loop. And if the agent edits files it should not touch, leaves no record, or claims success on broken code, the problem sits in the harness as a whole: its permissions, its records, or its checks.
Harness Engineering in AI vs Wire Harness Engineering
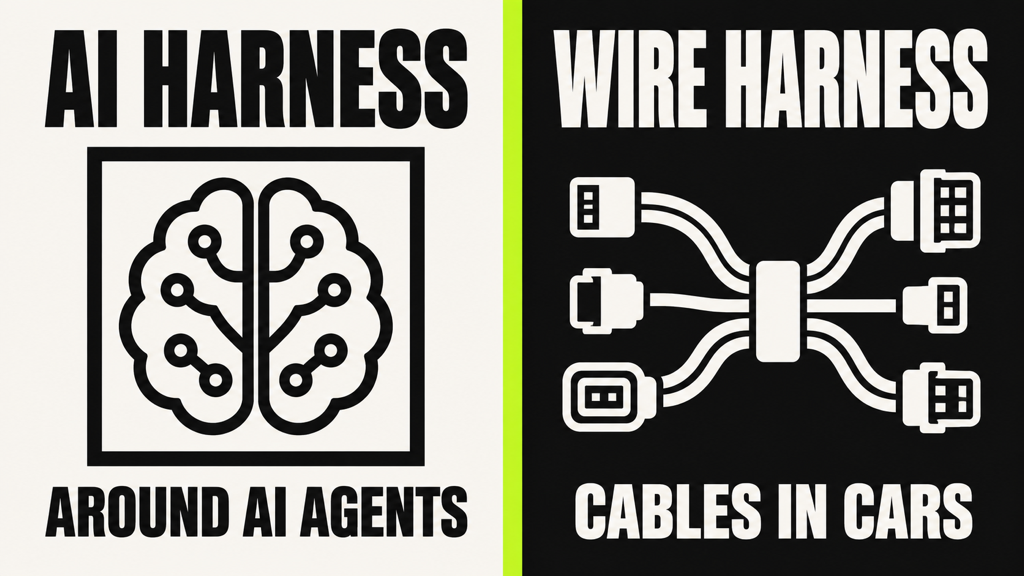
Search for “harness engineering” or “harness engineer jobs” and many results have nothing to do with AI. Wire harness engineering is an established field in car, aircraft, and electronics manufacturing. A wire harness is a bundle of cables, connectors, and protective covers that carries power and signals through a car, a plane, or a machine, and a harness engineer in that field designs how those bundles are routed and installed. Most salary pages and job listings for “harness engineer” describe that work. There is also a software company called Harness, which sells DevOps tools and runs its own training under the same name.
This guide is about harness engineering in AI, meaning the systems around language models and AI agents. The AI meaning comes from the horse harness and the software test harness, and it has nothing to do with electrical wiring. When you search for jobs, courses, or salary data, add words such as “AI agent”, “LLM”, or “coding agent” so the results match what you want to learn. Job titles also vary. You will more often see roles called AI engineer, agent engineer, applied AI engineer, or platform engineer for AI agents, with the harness work described in the job details.
AI Agent Basics You Need Before Learning Harness Engineering
You only need a handful of ideas about how AI agents work before harness engineering clicks. You do not need to know how a neural network is trained, and you do not need advanced math. You need a clear picture of the parts an agent is made of and how they work together.
1. Large Language Models and Tokens
A large language model, or LLM, is a program trained on a huge amount of text so it can predict what text should come next. ChatGPT, Claude, and Gemini are built on LLMs. The model breaks text into small pieces called tokens, which can be whole words, parts of words, or punctuation, and it writes an answer by predicting one token after another. At a large scale, that simple trick lets a model write code, summarize a contract, or draft an email. It also explains two limits that matter for harness engineering. The model only knows what it learned in training plus whatever you give it right now, and it does not remember your earlier requests unless the app sends that history back each time.
2. Prompts, Instructions, and the Context Window
The text you send to a model is called a prompt, and the most important part is usually the instructions. Many apps separate system instructions, which the developer writes once and which apply to every conversation, from user instructions, which describe the task at hand. Everything the model can consider has to fit inside its context window. Many current models accept hundreds of thousands of tokens, and some accept a million or more, but the space still has a limit, and models can miss details buried deep inside a very long context. During a request, the context window is the only place where information exists for the model.
3. Tools and Tool Calls
A tool is an ability the app around a model gives it, such as reading a file, running a terminal command, searching the web, or looking something up in a database. The model never runs a tool itself. When it decides a tool would help, it writes a tool call, a short structured request that names the tool and what to pass to it. The app runs the tool and sends the result back. Developers call this function calling or tool calling. Because the app sits between the model’s request and the real action, the app decides whether the action happens at all. If an agent asks to delete a folder, the app can refuse, ask you first, or allow it, and the model cannot get around that decision. That middle position is where most harness engineering happens.
4. APIs
An API, short for application programming interface, is a standard way for one program to ask another program for something. APIs show up twice in agent systems. Your app usually talks to the model itself through an API, and many of the agent’s tools are small pieces of code that call an API for the agent. When a customer support agent uses a tool called issue_refund, that tool may send a request to the payment company’s API. The tool gives the model one simple, clearly described action, and the API does the real work behind it.
5. Workflows vs AI Agents
Anthropic draws a helpful line between two ways of organizing AI work. In a workflow, the developer sets the steps in advance, and the model adds judgment at certain points. In an agent, the model decides which steps to take, which tools to use, and when the job is done. A support system that sorts an email, sends it to the right queue, and drafts a reply for a person to approve is a workflow. A coding agent that explores your project, decides which files to open, writes code, runs the tests, and fixes what fails is an agent. Anthropic recommends agents for open-ended problems where you cannot predict the steps, and workflows, or even a single model call, for simpler tasks. Real products often mix both.
6. The Agent Loop
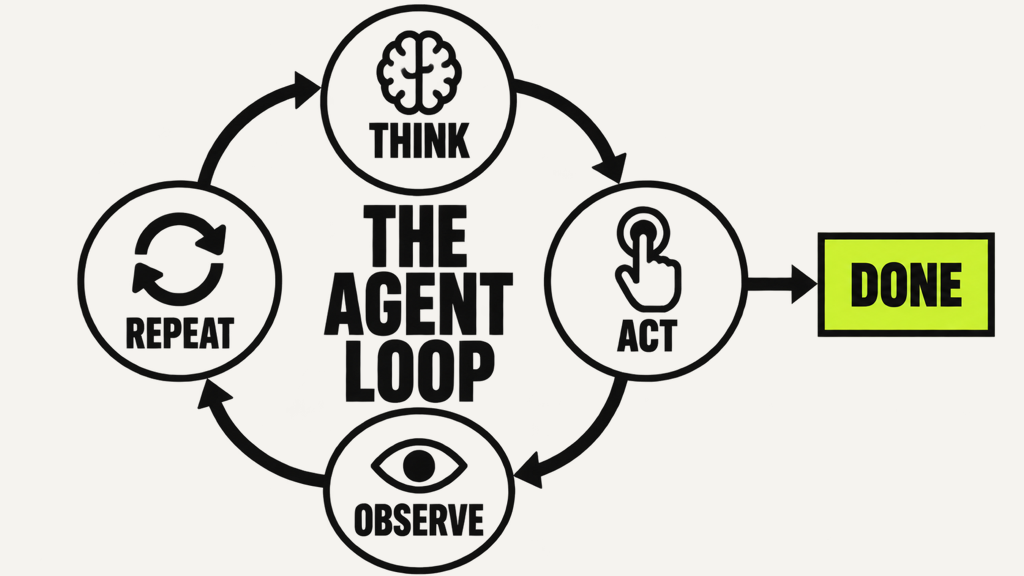
What makes an agent work is a simple cycle: act, look at the result, and keep going. The harness sends the model the goal, the instructions, the available tools, and everything that has happened so far. The model replies with either a tool call or a final answer. If it asks for a tool, the harness runs it, adds the result, and calls the model again. If it gives a final answer, the loop ends. That short description hides a lot of decisions. The loop has to know when to stop, and the model saying “I am done” is not enough, because models sometimes declare success on things that do not work. The loop needs a limit on how many rounds it can run, a place to record progress, and rules about which actions need your approval. None of those decisions happen inside the model. You have to design them into the harness.
The Main Components of an Agent Harness
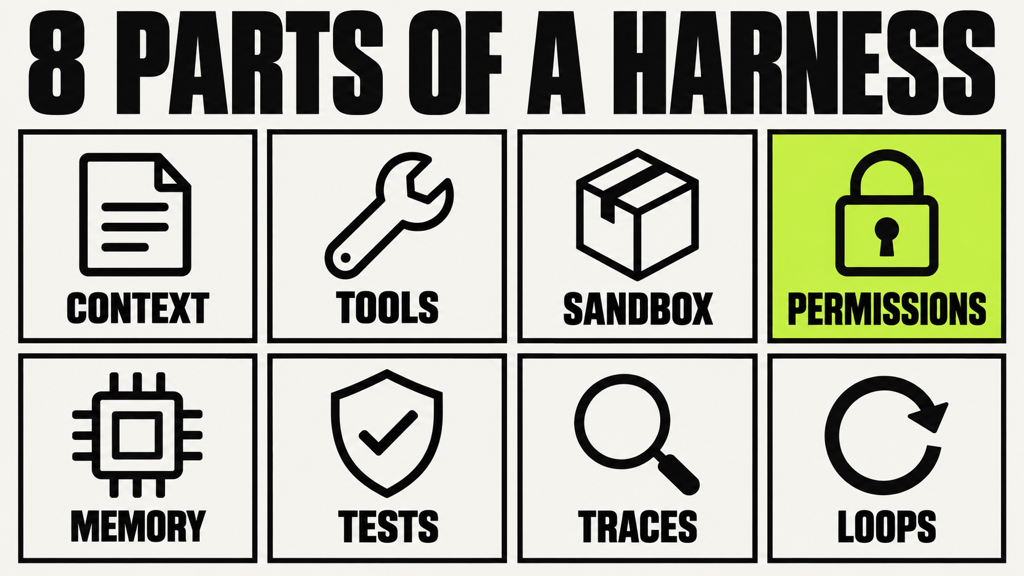
An agent harness has eight connected parts: guidance, capability, environment and boundaries, continuity, checking, visibility, correction, and control. Each part stops a different kind of failure, and together they work like layered security, where each layer catches what the others miss. Instructions without checks give you confident code nobody verified. Checks without saved progress make an agent redo finished work after every interruption. Permissions without records block dangerous actions but hide how often the agent tried them. Tests without stop rules can trap an agent retrying the same failure forever.
That does not mean every agent needs every part. The best harness is the simplest one that gives your task the reliability it needs. An agent that summarizes meeting notes needs far less than an agent that changes live code. Your goal is to know what each part does, which failure it prevents, and which ones your task calls for.
1. Instructions, Instruction Files, and AGENTS.md
Guidance is the first part: the instructions and information that tell the agent what to do. For coding agents, most of this lives in an instruction file, a document in the project that explains how the code is organized, which commands build and test it, and which rules to follow. The most common format is AGENTS.md, an open format now looked after by the Agentic AI Foundation under the Linux Foundation. Claude Code reads a similar file called CLAUDE.md, and Cursor uses its own rules files.
Instruction files carry a lot of weight, and they are easy to overload. OpenAI’s team found that one giant instruction file crowded out the actual task, went out of date quickly, and got so dense the agent could not tell which rules mattered. Their fix was a short main file that points to more detailed documents elsewhere in the project, plus automated checks that enforce the rules in code. Keep your file short and accurate, and make sure every line is there because an agent needed it.
2. Context Management: Compaction, Resets, and Progressive Disclosure
The harness builds a fresh context for every model call, so it needs rules about what to include. On a long task, the context fills up with file contents, tool results, and earlier attempts, and the model’s attention gets spread thin. You can manage this in several ways. You can compact the history into a summary, reset the model into a clean context with only what it needs, trim large tool results before sending them back, or hand a focused job to a helper agent, called a subagent, that works in its own context and returns a short answer. Progressive disclosure is a related idea: show the agent information in layers as it becomes relevant, so it does not have to load everything at once. Good context management also saves money, because tokens are the biggest cost for most agents.
3. Tools and Tool Design
Capability is the second part: the tools that let the agent act. Tool design matters more than most beginners expect, because the model picks tools by reading their names and descriptions, which means every tool description works as a prompt. Anthropic’s advice on writing tools for agents comes down to a few habits: build tools around real workflows instead of copying every API endpoint, give similar tools clear prefixes so the agent can tell them apart, return only the information the agent needs, and write error messages that tell the agent what to try next. A terminal is the most capable tool of all, because it lets the agent solve problems no one built a tool for, and that same freedom lets it delete files, install software, or read secrets. Broad tools need strong limits, which is why you always design tools and permissions together.
4. MCP: The Model Context Protocol
The Model Context Protocol, or MCP, is an open standard for connecting AI apps to other systems. Before MCP, every AI app needed custom code for every service it talked to. With MCP, a service such as GitHub, a database, or a documentation site offers its abilities once through an MCP server, and any compatible AI app can use them. The app, called the host, connects to each server, and each server offers tools, data, or ready-made prompts. MCP makes it much easier to give an agent new abilities. It also adds responsibility: an MCP server from an unknown source can behave differently from what it claims, so review each new one as carefully as you would a new software library.
5. Agent Skills
An agent skill is a packaged folder of instructions, scripts, and reference files that teaches an agent how to do one kind of task, such as building a spreadsheet, following your company’s writing style, or running a release checklist. Anthropic introduced the skills format using progressive disclosure: the agent sees only a short description of each skill at the start and loads the full contents only when a task needs it. That way you can give an agent deep know-how without filling its context with material it does not need right now.
6. Workspaces, Sandboxes, and Permissions
Environment and boundaries form the third part. A workspace is where the agent does its work, such as a fresh copy of your project on its own branch. A sandbox is a sealed-off environment where the agent can run commands and change files without touching the rest of your system, often built with containers, which are packaged, isolated environments with their own files and programs. Permissions are the rules that decide what the agent can reach: which folders it can edit, which commands it can run, and which websites or servers it can contact.
The guiding rule is least privilege: give each part of the system only the access it needs for its job. Security people also talk about blast radius, meaning how much damage one bad action could cause. Picture the habit-tracker agent running on your laptop, where a settings file holds the password to your live database. The agent runs a database change to test its feature and, with no limits in place, runs it against the live database instead of a test copy. The tool did exactly what it was built to do. The harness failed to decide where the tool could run and what it could reach. A sandbox with no live passwords and no route to the live system would have made that mistake impossible.
7. Secrets, Approval Gates, and the Lethal Trifecta
A secret is anything that proves identity or grants access, such as a password, an API key, or a private key. A good harness keeps secrets out of the agent’s context and sandbox wherever it can, and hands out narrow, short-lived access only when the agent needs it. An approval gate is a point where the harness pauses and waits for a person to decide. Use approval gates for actions that cannot be undone, have a big impact, or fall outside the agent’s normal work, such as merging code, deploying, or moving money.
The developer Simon Willison named a danger every harness engineer should know: the lethal trifecta. It is the combination of an agent that can read private data, sees content from outside sources, and can send information out. Put those three together and an attacker can hide instructions in a web page, email, or support ticket that trick the agent into sending your private data to them. That attack is called prompt injection, and OWASP ranks prompt injection as the top security risk for apps built on language models. No prompt reliably prevents it. The defense is in the design: make sure those three conditions never meet in one agent, and enforce limits in the sandbox, where the model cannot talk its way past them.
8. State, Memory, and Long-Running Work
Continuity is the fourth part. State is the record of where the work stands, kept by the harness rather than the model: files, saved versions, test results, task status, and how much budget is used. Memory is information saved outside the context window for later. Short-term memory covers one session, usually its message history. Long-term memory lasts across sessions and comes in three useful kinds: semantic memory for facts, such as a product decision; episodic memory for experiences, such as an approach that failed last week; and procedural memory for how-to rules, which for agents usually means instruction files, prompts, and skills.
Long-running tasks, which take longer than one session can hold, depend on continuity more than anything. Anthropic saw this clearly when it asked an agent to build a complete web app. The agent tried to do too much at once, ran out of room in the middle of a feature, and left the next session guessing. Later sessions would see that some progress had been made and declare the whole job finished when much of it was not. The fix was a harness change. A first setup agent wrote a detailed feature list, created a progress file to log what each session did, and saved a first version. Every later session worked on one feature, logged its progress, and left the code in a clean state. Related tools include checkpoints, which are saved snapshots you can go back to, and idempotency, which means an action is safe to repeat after an interruption.
9. Guardrails, Tests, and Evals
Checking is the fifth part. A guardrail is a check that runs while the agent works and stops or redirects it when an input, output, or action crosses a line. Input guardrails check what comes in, output guardrails check what goes out, and tool guardrails check each tool call. Tests are code that runs your code with known inputs and confirms the results: unit tests, integration tests, acceptance tests written from the task’s requirements, and end-to-end tests that use the app the way a person would.
Checks come in two kinds. Deterministic checks give the same answer every time for the same input: tests, format checks, linters, type checkers, and permission checks. They are fast, cheap, and trustworthy. Inferential checks use an AI model to judge things fixed rules cannot measure, such as whether a reply is helpful or code is easy to read. The most common is LLM-as-judge, where a model scores an output against a scoring guide. These are flexible but slower and less consistent, so run the deterministic checks first and save the AI judges for what rules cannot catch.
Evals measure how well an agent performs across a set of tasks. Because agents vary from run to run, an eval runs each task several times and scores the results. Anthropic explains two useful measures: pass@k is the chance that at least one of k attempts succeeds, which fits tasks where one good answer is enough, and pass^k is the chance that all k attempts succeed, which measures consistency for agents that must work every time. Regression evals are tasks your agent should nearly always pass, including past failures you have fixed, and they tell you whether a change to the harness broke something that used to work.
10. Logs, Traces, and Observability
Visibility is the sixth part. Observability means being able to understand what a system did and why, from the data it records. A log is a timestamped note written when something happens. A trace records one whole run from start to finish as a set of nested steps, so for an agent you can see every model call, every tool call, every result, and every decision. Metrics are numbers tracked over time, such as success rate, cost per task, and error rate. Tools such as LangSmith and Langfuse collect all of this for agents, and OpenTelemetry is the open standard many of them build on.
Traces are how you debug an agent. Without them, you only know that a run failed. With them, you can open the run, find the first moment it went wrong, and see exactly what the agent saw at that point. LangChain’s big benchmark gain came from reading traces at scale to spot repeated failure patterns, which tells you how central this part is.
11. Hooks
A hook is a point in the agent’s work where the harness runs its own code, such as after every file edit or before every tool call, so certain actions happen every time, whatever the model decides. Hooks turn requests into guarantees. You can ask an agent in its instructions to format code after each edit, and it will usually do it. A hook that formats after each edit makes it automatic. Claude Code, for example, lets you set hooks that run commands at chosen points, and LangChain used hooks to catch doom loops, where an agent keeps repeating the same failing actions.
12. Feedback, Verification, and the Steering Loop
Correction is the seventh part. Feedback is information about the result of an action that goes back to the agent so it can adjust: test results, lint errors, blocked actions, and review comments. Verification means checking the final state of things for yourself, because an agent’s own report of what happened can be wrong. A good habit here is reviewer separation, where a different agent or a person judges the work, since agents tend to grade their own work too kindly. The steering loop is the bigger cycle around all of this: people watch the agent’s behavior across many runs, spot repeated problems, improve the harness, and confirm the improvement with evals.
The eighth part, control, covers loops, graphs, multiple agents, and human approval. Each has its own section below.
Guides and Sensors: Feedforward and Feedback in a Harness
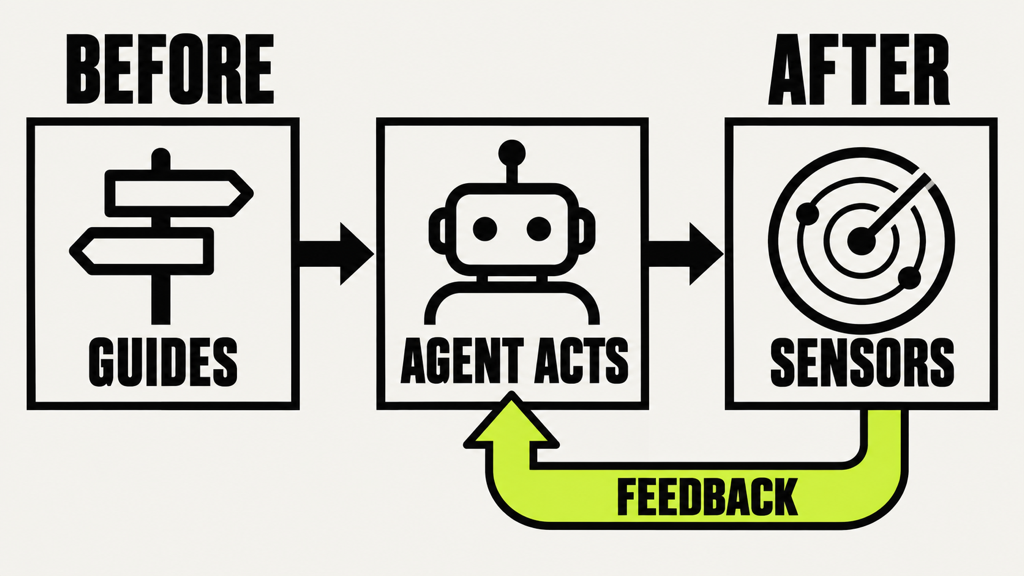
Guides steer the agent before it acts, and sensors check the result after it acts. Birgitta Böckeler uses these two words to explain how a harness controls an agent, and they are one of the most useful ideas in the field. Guides are feedforward: instructions, relevant context, tool descriptions, skills, templates, and structural rules, all meant to make the agent’s first attempt more likely to be right. Sensors are feedback: tests, type checkers, linters, review agents, and automated build checks, all meant to catch what went wrong and send that back so the agent can fix it.
Böckeler also sorts each control as computational or inferential. Computational controls are regular code, such as a linter or a test suite, and they give reliable answers in seconds. Inferential controls use an AI model, such as an AI code reviewer, and they are slower, cost more, and vary more, but they can judge things no fixed rule can. Put the two ideas together and you get four kinds of control, and a mature harness uses each where it fits.
You need both directions. With sensors alone, the agent keeps making the same mistakes and relies on the checks to catch them every time, which wastes time and money. With guides alone, the agent follows rules without ever learning whether they worked. Feedback also arrives at different speeds: a linter responds in seconds, a full test suite in minutes, a human review in hours, and production monitoring over days. Böckeler calls the goal keeping quality left, which means catching each problem at the fastest, cheapest point possible, so a mistake a linter could catch never waits for a human reviewer.
The Three Kinds of Harness: Maintainability, Architecture Fitness, and Behaviour
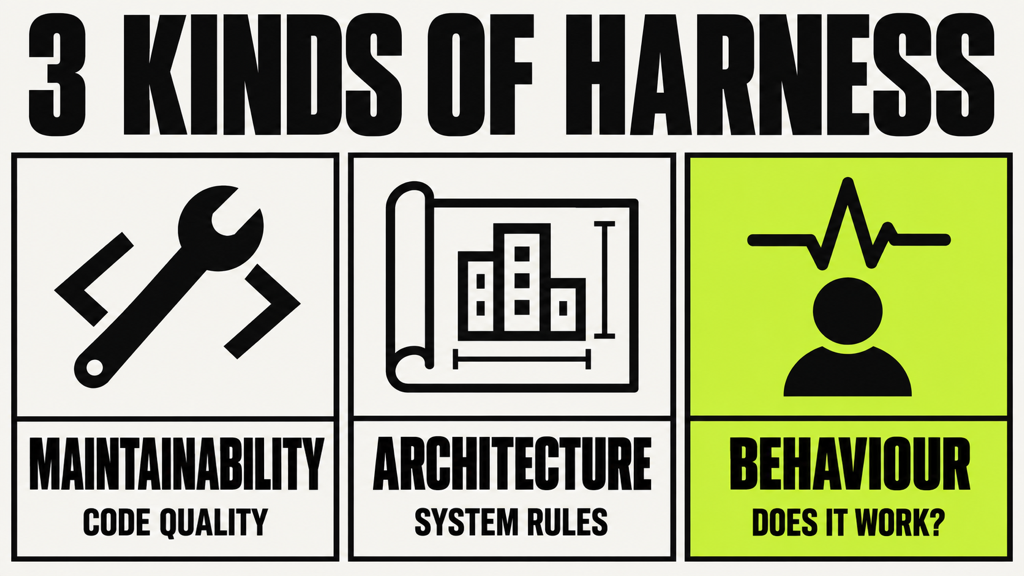
Böckeler also groups the checks in a coding-agent harness by what they protect, and her three groups show you which parts of a harness are easy to build and which are still hard. She calls them regulation categories.
1. Maintainability Harness
The maintainability harness protects the quality of the code itself: duplication, complexity, test coverage, naming, and style. It is the most mature of the three, because software teams have built linters, formatters, and code-analysis tools for decades, and an agent can run all of them after every change. If your agent writes messy code, strengthen this harness first. It is also the cheapest.
2. Architecture Fitness Harness
The architecture fitness harness protects the qualities of the whole system: speed, security rules, how parts depend on each other, and logging standards. Its checks are called fitness functions, automated tests that confirm your system still has a property you care about, such as “the user interface never talks to the database directly” or “this page loads within one second.” OpenAI’s team enforced rules like these with custom linters, which let agents move fast without slowly wrecking the structure of the code.
3. Behaviour Harness
The behaviour harness checks whether the app does what users need. It is the hardest of the three, because correct behavior depends on requirements that often live only in people’s heads. Tests written from the requirements, acceptance criteria agreed before the work starts, end-to-end checks that click through the app like a user, and evaluator agents that try the running app all belong here. Böckeler describes this as the area where the field still has the most open questions.
4. Harnessability and Harness Templates
Two more ideas from the same article are worth knowing. Harnessability is how easy a codebase is for an agent to understand and work in. A well-organized project with clear types, clear commands, good documentation, and reliable tests gives the harness more to hold on to, so the same agent performs better there than in a messy project with flaky tests. Improving harnessability counts as harness work, even though you do it in the code. Harness templates are ready-made starting harnesses for common kinds of projects, so a team does not rebuild the same instruction files, checks, and permissions from nothing for every new service.
Loop Engineering Explained: How Agents Keep Working Until the Job Is Done
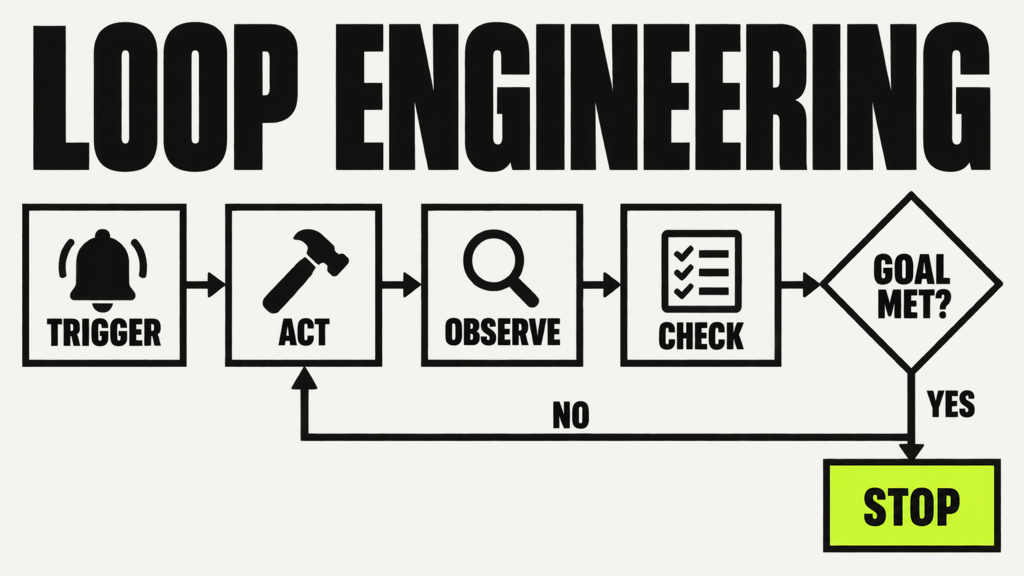
Loop engineering is the practice of designing loops that move an agent toward a goal with as little human input as possible, so the work keeps going, and stops, without you typing each next step. A loop is a repeating cycle built around a goal. In each round, called an iteration, it acts, looks at the result, checks progress against the goal, and decides whether to continue, change course, or stop. IBM breaks this into four parts: a goal checked every round, an action toward it, an observation of what happened, and an adjustment before the next round.
1. Triggers
Every loop starts with a trigger, the event that kicks off a run. The simplest trigger is you typing a request. Loop engineering adds triggers that do not need you. A schedule can start a run every night. An event can start one when a new ticket appears, when an automated test run fails, or when errors spike on your live site. The trigger also carries the input: a trigger fired by a new ticket hands the ticket’s details to the loop.
2. Tasks and Success Criteria
The loop works on one task per run, and how you define that task has a big effect on success. IBM recommends goals that are specific, sensibly sized, and broken into testable pieces. Geoffrey Huntley, who popularized the Ralph loop pattern, designs his loops to do one task each. Every task also needs success criteria, clear conditions that define a good result. IBM gives a neat contrast: “make my website load faster” never tells the loop when it is finished, while “stop when your code passes all unit tests and meets the requirements” gives it a clear finish line. For the weekly streak, success might mean all existing tests pass, the new streak tests pass, the badge shows correctly in the browser, the code checks report no errors, and no files outside the allowed folders changed. The harness can check all of that without asking the agent whether it thinks it is done.
3. Planning, Acting, Observing, and Checking
For anything bigger than a tiny change, the loop plans first by breaking the task into smaller steps, often written into a plan file the agent follows and updates. Then each round acts, observes, and checks. Acting is taking a step, usually through tool calls. Observing is looking at the result, such as the change made or the test output. Checking compares where things stand with the success criteria and the plan. Observing tells you what happened, and checking tells you what it means for the goal. Fast automatic checks are what make it affordable to check every round.
4. Retry or Adjust
When a check shows a problem, the loop can retry or adjust, and each suits a different kind of failure. A temporary failure, such as a service that timed out, calls for a plain retry, often waiting a bit longer between each attempt so it does not overload a struggling service. A real failure, such as a test failing because the logic is wrong, calls for a change of approach, because running the same wrong code again gives the same failure. Adjusting can mean fixing the code based on the exact error, changing the plan, gathering more information, or going back to the last saved checkpoint and trying something different.
5. The Spine: Memory Inside a Loop
A loop that runs for more than a few rounds needs a saved record of progress that it updates every round, so later rounds know what is done and do not repeat past mistakes. IBM calls this the spine of the loop, and Addy Osmani uses the same word for the one place a loop keeps its memory: a file or board outside any single conversation that says what is finished and what comes next. The Ralph loop takes this idea far. It catches the agent’s attempt to finish and feeds it the original goal again in a fresh, empty context, so the agent keeps working until the goal is met and checked. Each round learns where things stand by reading the files the last round left behind. The files carry the work forward, and the model starts each round with a clean slate. Huntley calls the checks that push back on the agent, such as tests that cannot be fooled, back pressure.
6. Stop Conditions and Budgets
A stop condition is a rule that ends the loop: verified success, a used-up budget, a need to hand over to a person, or a cancellation. Every loop needs hard limits, because a confused agent can repeat the same failing action forever and spend real money doing it. Typical limits are a cap on retries for any single problem, a cap on total rounds, a token limit, a time limit, and a spending limit. A good loop also notices when it has stopped making progress, such as the same test failing with the same error again and again, and hands over to a person before it burns the whole budget. The agent saying it succeeded is never enough on its own. The harness checks the result before the loop can end with success.
Graph Engineering Explained: Nodes, Edges, and Routes
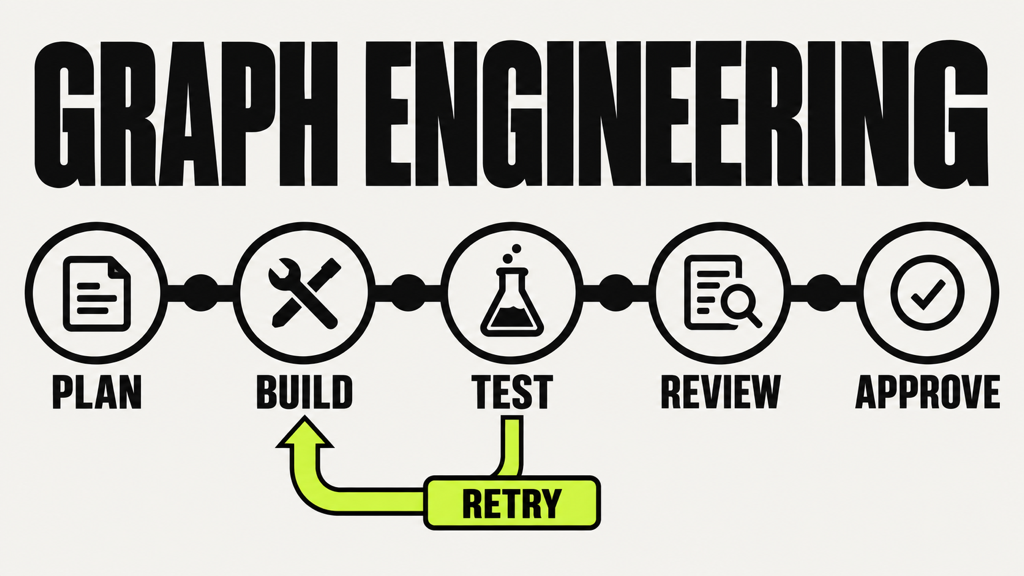
Graph engineering is the practice of designing agent workflows as connected steps: deciding what the steps are, how they link, what information they share, and which paths the work can take. It suits work with distinct stages, stages that depend on each other, steps that could run at the same time, and results that should send the work forward or back. You could try to cram all of that into one loop with one long set of instructions, but the structure ends up hidden in the prompt, where it is hard to see, hard to test, and easy for the model to ignore. A graph puts the structure out in the open.
1. Nodes
A node is one step in the graph. In LangGraph, each node receives the current state of the work, does something, and returns the updated state. Nodes come in several kinds. Some run plain code with no AI, such as running the test suite or opening a pull request. Some use a model once, such as sorting a ticket into a category. Some run a full agent loop with tools, such as building a feature. Some pause and wait for a person to approve, reject, or add information. A node can even hold a smaller graph inside it, called a subgraph, so a complex step can have its own internal steps.
2. Edges, Conditional Edges, and Routing
An edge is a link that decides what runs next. A fixed edge always goes to the same next step: after building, the work always goes to testing. A conditional edge looks at the current state and chooses: after testing, the work goes to review if the tests passed and back to building if they failed. The logic that picks the path is called routing. Rule-based routing follows a fixed rule and should be your default whenever a rule can decide. Model-based routing lets an AI model choose, such as reading a customer message and deciding whether it is about billing or a technical problem. If you use a model to route, limit its answer to the valid options and test it separately, because a request sent down the wrong path gets handled confidently and wrongly by every step after it.
3. Shared State and Checkpoints
State is the information all the steps share as the work moves through the graph: the ticket, the plan, the branch name, the files changed, the latest test results, review comments, and how many attempts each stage has used. Each step reads what it needs and writes back its results. When several steps update the same piece of state, a rule called a reducer decides how the updates combine, for example by replacing the old value or adding to a list. Graph frameworks also save checkpoints between steps, so an interrupted graph can pick up from the last completed step instead of starting over.
4. Cycles, DAGs, and Parallel Work
A cycle is a path that loops back to a step the work already visited, such as from testing back to building. A graph with no cycles is called a DAG, short for directed acyclic graph, where the work only ever moves forward. DAGs suit data pipelines. Agent workflows usually need cycles, because agents fail, get feedback, and try again. So every cycle needs what a loop needs: success criteria, saved state, and hard limits, often an attempt counter that sends the work to a person when it runs out. Graphs also make parallel work easy through fan-out and fan-in: the work splits into branches that run at the same time and then rejoins at a step that waits for all of them. Graphs do not replace loops. Loops live inside graphs, both as cycles between steps and inside individual steps that run their own agent loop. Frameworks built for this include LangGraph, Google’s Agent Development Kit, and Microsoft’s Agent Framework.
Multi-Agent Systems and Human Control
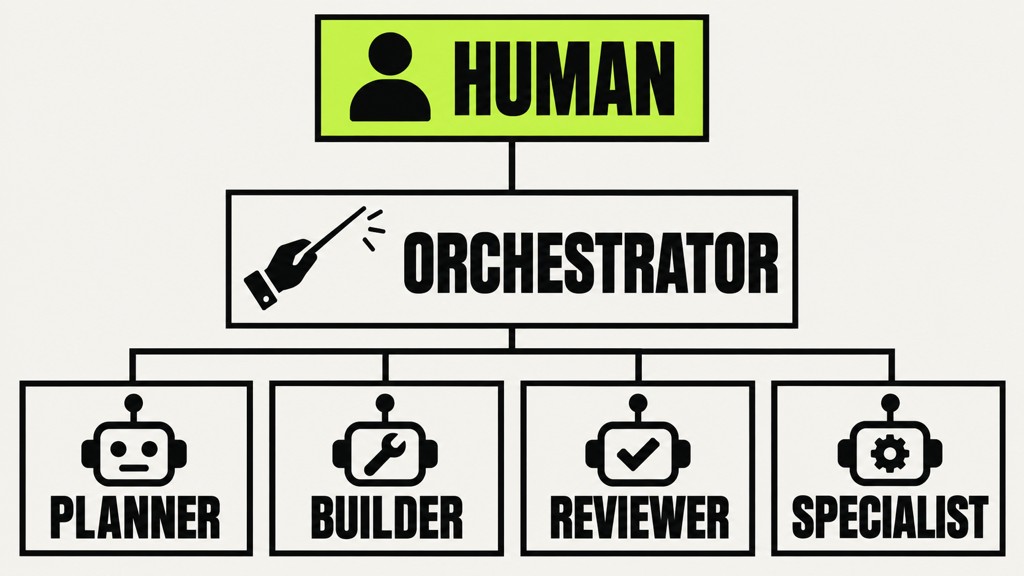
A multi-agent system uses several agents working together, each with its own instructions, tools, and context, coordinated by another agent, a graph, or a set of handover rules. People get very excited about agent teams, and real-world experience points to a more careful view. Multiple agents help with some work, add cost and new ways to fail in other work, and never remove the need for people to stay in control. Add an agent only when it solves a specific problem a simpler setup could not.
1. Single-Agent vs Multi-Agent Systems
A single-agent system is one model in one loop with one continuous context. OpenAI recommends getting as much as you can from a single agent before adding more, and the team at Cognition, which builds the coding agent Devin, argues in Don’t Build Multi-Agents that one agent working through a task in one continuous line stays consistent, because every decision can see every earlier decision. A single agent is also cheaper and easier to debug. Its limits show up when a task outgrows one context, when separate pieces of work could run faster in parallel, or when the agent is asked to judge its own work.
Cost matters too. Anthropic measured that agents use about four times as many tokens as chat, and multi-agent systems about fifteen times as many. That cost makes sense for high-value work that benefits from exploring many paths at once, such as broad research, and makes little sense for small tasks one agent handles well. It also lines up with the 2026 finding that adding a second reviewer agent can make results worse.
2. Common Agent Roles
Agents in a team usually take on familiar roles. A planner turns a goal into a plan with steps, features, and a clear definition of done. Builders carry out the plan, ideally each with a fresh, focused context for one piece of work. Reviewers read the work, and evaluators try it out, for example by clicking through a running app like a user. Specialist agents focus on one area, such as security or database changes. An orchestrator splits the work, hands it out, collects the results, and decides what happens next. Anthropic learned how much the orchestrator’s instructions matter: early versions of its research system launched fifty helper agents for simple questions and searched endlessly for sources that did not exist, until the team taught the orchestrator to give each helper a clear goal, an answer format, guidance on tools, and clear limits.
3. Handoffs and Subagents
A handoff is passing work, along with everything needed to continue it, from one agent, session, or person to another. A handoff is only as good as what travels with it. A specialist that receives only the customer’s last message may ask them to repeat everything, while one that receives the full conversation, the account details, and the first agent’s notes can carry on smoothly. A subagent is a helper agent started by another agent to handle one focused job in its own context and return a short result, which keeps the main agent’s context clean.
4. Human-in-the-Loop and Human-on-the-Loop
Human control comes in two main forms. With human-in-the-loop, people step in at set points, such as approving a merge, reviewing a refund above a certain amount, or answering a question the agent cannot. With human-on-the-loop, people do not approve every step but watch the system and step in when needed. Escalation is the path that sends a problem from the agent to a person when it goes beyond the agent’s authority, ability, or limits. Be careful not to overdo approval requests: when people get too many, they start clicking approve without reading, which is exactly what the 2026 study of 113 supervisors found.
How a Complete Agent Harness Works: A Step-by-Step Example
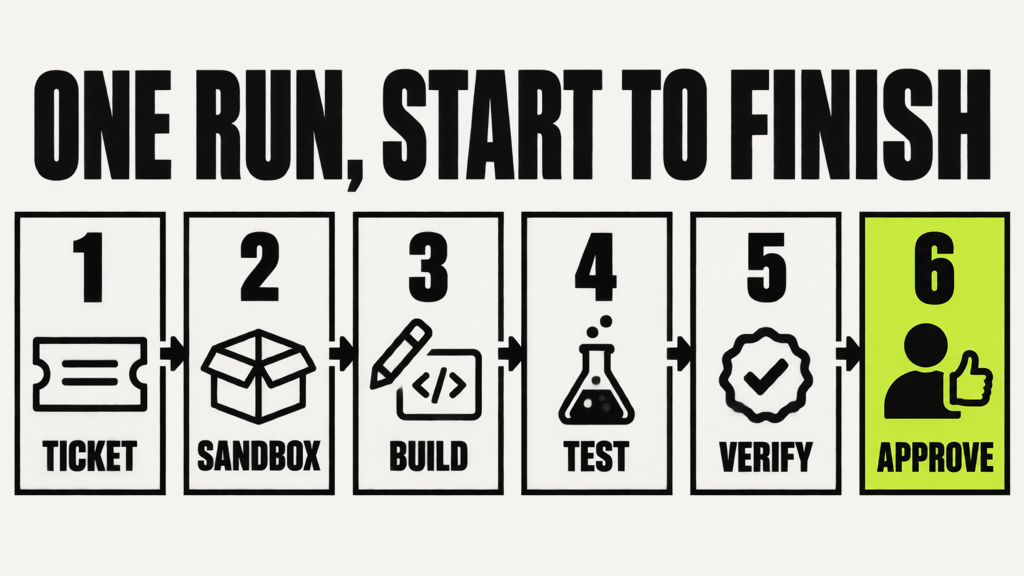
Here is one full run of the habit-tracker agent, from the moment a ticket arrives to the moment a person approves the result.
A ticket arrives asking for the weekly streak feature, and a team member marks it ready for the agent, which starts a run. The harness creates a separate workspace, a fresh copy of the project on its own branch, inside a sandbox with no access to the live systems or real passwords. It builds the starting context: the agent’s standing instructions, the project’s AGENTS.md file, the ticket, and any progress notes from earlier sessions on the same task.
The harness gives the agent the tools it needs, each with its own permissions. The agent can edit files in the source and test folders, but not the settings folder. It can run the tests, but it cannot deploy. The agent reads the ticket, explores the code, writes a short plan, and starts editing. After each edit, a hook formats the code, runs the relevant tests, and returns a short report of any failures. When a test fails because weeks start on Monday in one file and Sunday in another, the agent sees the error, fixes the mismatch, and tries again. The loop keeps going within limits the harness enforces: a maximum number of attempts, a time and cost budget, and a rule that hands the task to a person if the same failure repeats three times.
When the agent says it is finished, the harness does not take its word for it. It runs the full test suite, checks the change against the ticket’s requirements, and confirms that no forbidden files changed. Only then does it open a pull request that lists the change, the tests that ran, and any assumptions the agent made. A person reviews and approves the merge. Throughout the run, the harness records every model call, tool call, result, and decision. If something breaks tomorrow, the team can open that record, find the step that went wrong, and fix the part of the harness responsible.
If the team uses a ready-made coding agent, the product supplies the loop, the core tools, context compaction, and most of the coordination. The team supplies the instruction file, the permission settings, the hooks, the approval rules, and the tests that define correct behavior. If the team builds its own agent with a framework, it designs more of those pieces itself. Either way, the parts are the same, and so are the questions each part answers.
Real-World Harness Engineering Examples
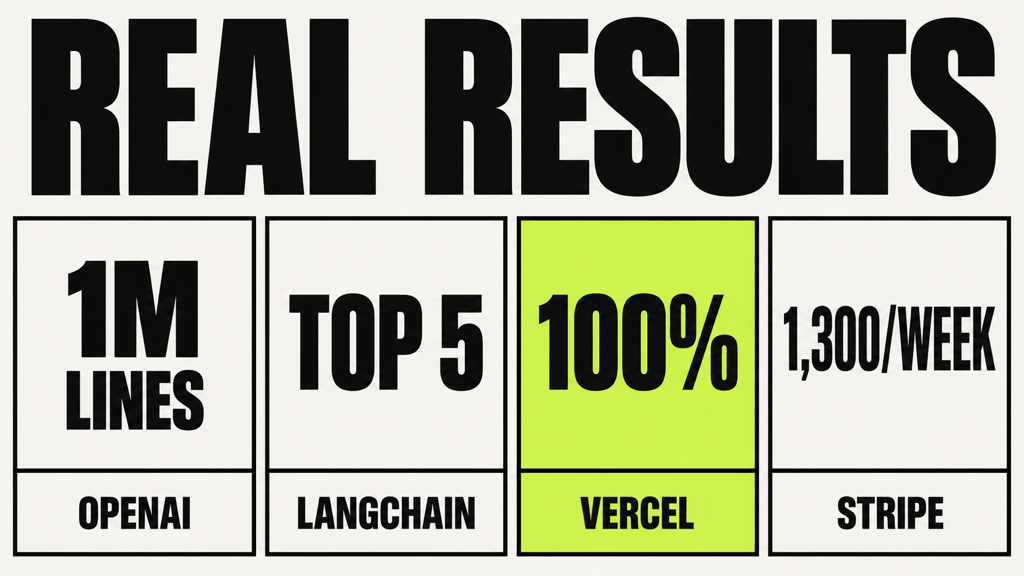
The best evidence for harness engineering comes from teams that shared what they built and what changed as a result. Each example below shows a different part of the harness doing the heavy lifting.
1. OpenAI: A Product Built Entirely by Agents
OpenAI’s team shipped a product over five months with Codex agents writing all of the code, roughly a million lines. The engineers spent their time on the environment: a short instruction file that pointed to deeper documents, structural rules enforced by custom linters, and feedback loops that let agents check their own work. Whenever an agent failed, the team looked for the missing piece in its environment and added it.
2. LangChain: A Benchmark Jump With the Same Model
LangChain raised its coding agent’s score on Terminal Bench 2.0 from 52.8 percent to 66.5 percent without touching the model. Every change was a harness change: instructions that pushed the agent to check its own work, better tools and information about its environment, and hooks that caught problem patterns such as doom loops. The team found those patterns by reading traces at scale, which shows how much good records pay off.
3. Anthropic: Agents That Work Across Many Sessions
Anthropic’s agents stalled on long projects by trying to do everything at once and by declaring victory too early. The fix was a setup agent, a feature list, a progress file, a saved version after each checked step, and a rule of one feature per session. The model stayed the same. The system around it gave the model a clear definition of done and a reliable record of where the work stood.
4. Vercel: Fewer Tools, Better Results
Vercel cut 80 percent of the tools from one of its agents, and its success rate on the same model rose from 80 percent to 100 percent, while each task dropped from 724 seconds to 141. It sounds backwards, and it makes sense once you remember that every tool is a choice the model has to make. A small set of well-designed tools beats a huge menu.
5. Stripe: Pull Requests at Scale
Stripe has described agents it calls Minions that produce about 1,300 pull requests a week, with roughly 70 percent merged without any human rework. Numbers like that only work when automated checks, review steps, and permissions carry the load that human attention would otherwise have to carry.
6. Mitchell Hashimoto: The Ratchet Habit
Hashimoto turns every agent mistake into a permanent fix, either a line in the instruction file or a new tool, so the same mistake cannot happen twice. Many people now call this the ratchet principle, after the tool that only turns one way. It is the simplest harness habit you can start today.
7. Everyday Coding Agents
Claude Code, Codex, Cursor, and similar tools are models running inside large harnesses. When you add an AGENTS.md or CLAUDE.md file, set permissions, add hooks, and connect MCP servers, you are extending that harness for your own project. That means many developers already practice harness engineering without knowing the name.
Harness Engineering Beyond Coding Agents
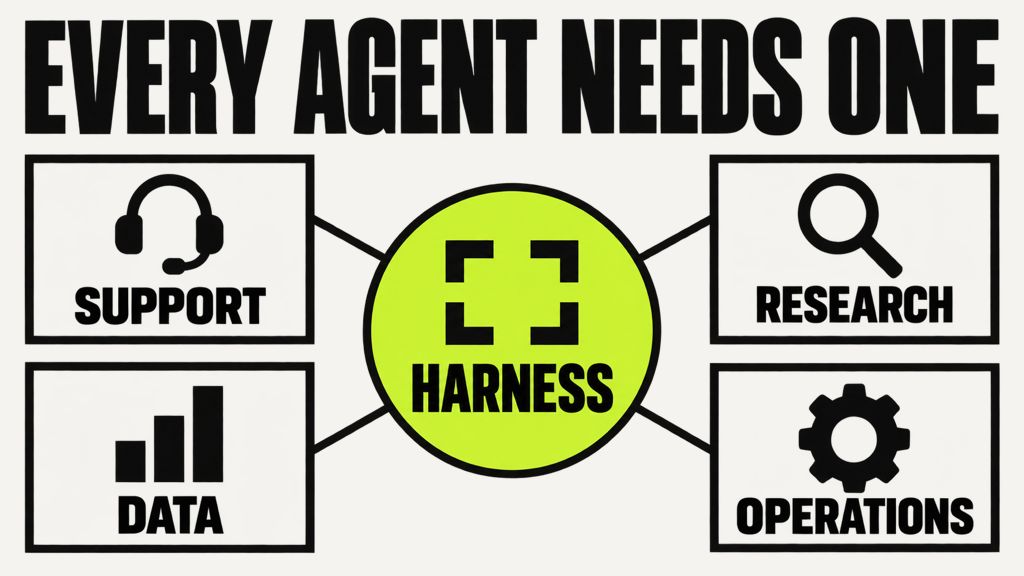
Most writing about harness engineering focuses on coding agents, because that is where the practice started, but every part of this guide applies to agents that do other work too. Coding happens to have unusually good checks: code either runs or it does not, and tests pass or fail. Other areas need more thought about how to check the work, and that is where harness design makes the biggest difference.
1. Customer Support Agents
A support agent reads tickets, looks up orders, checks policies, and drafts or sends replies. Its harness needs the current policy documents, not last year’s; tools that can read order data but cannot change it without permission; business rules written in code, such as a hard cap on refund amounts; checks that catch prompt injection hidden in customer messages; an approval step for refunds above a set amount; and a handover to a person when a customer is upset or the case is unusual. Its evals measure whether replies follow policy and whether the agent hands over the cases it should.
2. Research Agents
A research agent searches, reads, and summarizes sources into an answer. Its biggest risks are invented sources, endless searching, and instructions planted in web pages. Its harness limits the number of searches, keeps the agent that reads web pages away from private data, requires a source for every claim, and adds a check that each cited source exists and says what the answer claims. Anthropic’s research system follows this pattern, with a lead agent, helper agents working in parallel, and rules that scale the effort to how hard the question is.
3. Data Analysis Agents
A data analysis agent writes and runs queries or code against your data. Its harness gives it read-only database access, a sandbox for running code, a description of the data tables in its context, limits on query size and cost, and checks that compare its numbers against known totals. A person reviews the analysis before it reaches a decision-maker, because a confident chart built on a wrong calculation is worse than no chart.
4. Business Operations and Content Agents
Agents that update a CRM, draft marketing emails, or prepare reports need the same parts in a lighter form: your brand and style rules as context, tools limited to the systems they touch, a review step before anything reaches a customer, and a log of who approved what. BCG’s banking case, covered later in this guide, shows these parts at work in a heavily regulated industry, where the approval steps and guardrails made the difference between a demo and a system the bank could actually use.
Why AI Agents Fail and How Harness Engineering Fixes Them
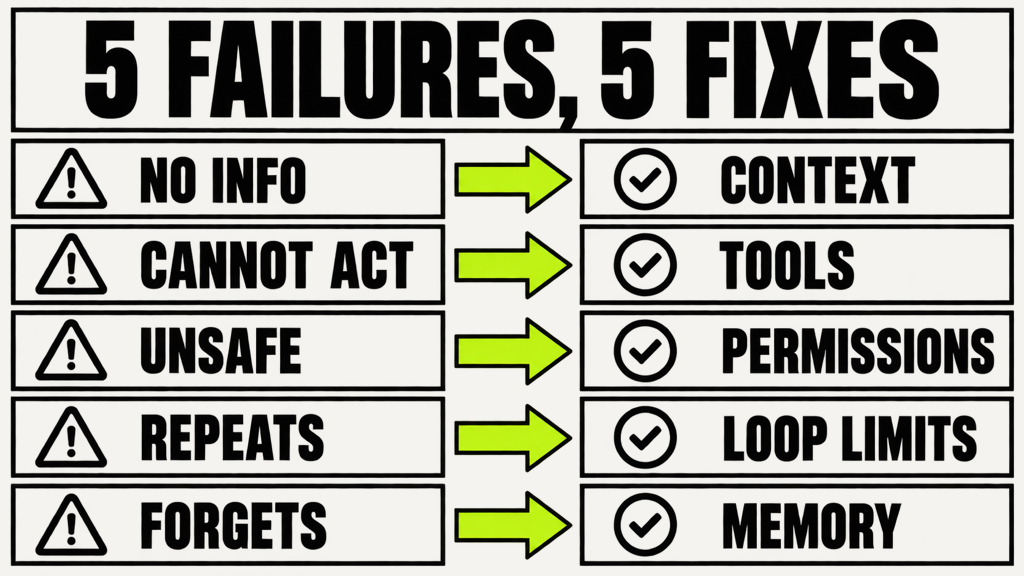
Most agent failures trace back to one specific part of the harness, and the most practical skill in harness engineering is finding that part before you touch the prompt. When an agent fails, the natural reaction is to add a line to the prompt: “be more careful” or “always run the tests.” Over time the prompt fills with rules that contradict each other, each one written to patch one old mistake. And a longer prompt only changes one part of a system with many parts. If the real cause is in the tools, the permissions, the saved state, or the checks, no amount of extra instruction will fix it.
Research backs this up. Mert Cemri and colleagues studied more than sixteen hundred failed runs from seven popular multi-agent frameworks and found fourteen distinct ways they fail, in three groups: problems in how the system is designed, disagreement between agents, and weak checking. In one case, a system asked to build a Wordle game with a new word each day kept using a fixed word list, even after the researchers rewrote the request to rule that out. The problem was in how the system was built to read requirements, and clearer wording could not reach it.
1. How to Diagnose an Agent Failure
Use the same method every time. Describe the failure exactly: what the task required, what happened instead, and how you noticed. Collect the evidence from the trace, the logs, the saved state, and the test results. Find the first moment the run went wrong, because later mistakes usually follow from an earlier one. Then ask a few questions. Did the agent have the information it needed? Could it take the action it needed? Was it allowed to take the action it took? What feedback did it get, and was that feedback accurate? What told it to keep going or stop? The answers point you to the part of the harness to fix. Make the smallest change that fixes the cause, run your evals to confirm it helped without breaking anything else, and add the failure to your test set so it cannot quietly come back.
2. The Agent Lacks Information
The agent writes a helper that already exists, follows a rule the project dropped, or quotes a policy wrong. Open the trace at the moment of the decision and check whether the needed information was in the context. If it was not, fix the context: point to the information from the instruction file, improve the search tool, tidy up the documentation, delete the out-of-date document that caused the confusion, or change compaction so it keeps important decisions.
3. The Agent Cannot Act
The agent describes what it would do instead of doing it, builds clumsy workarounds with long commands, or keeps making the same failed tool call. Fix the tools: add the missing one, merge several narrow tools into one that fits the workflow, rewrite a vague description, return error messages that say what to try next, or remove overlapping tools that confuse the agent’s choice.
4. The Agent Takes Unsafe Actions
The agent tries to edit files outside its area, runs destructive commands, reaches for passwords, or follows instructions hidden in a ticket or web page. Treat blocked attempts as warnings, not wins: a guardrail that stopped the agent also showed you that the agent wanted to do something your design did not expect. Fix the environment, permissions, and guardrails: narrow the permissions, move the limit into the sandbox so the system enforces it, add a guardrail or an approval step, or separate reading outside content from having write access so the lethal trifecta cannot form. A new line in the prompt is the one fix you cannot rely on here.
5. The Agent Keeps Repeating Itself
The agent runs the same command again and again, edits a file back and forth, or burns through tokens without getting any closer, and the run ends when the budget runs out. Fix the loop: add progress detection, cap the attempts on any single problem and roll back when the cap is hit, keep a list of approaches that already failed, fix or set aside flaky tests that fail at random, and hand over to a person sooner.
6. The Agent Forgets Its Progress
The agent redoes finished work, contradicts an earlier decision, loses track after a compaction, or opens a second pull request for the same ticket. Fix state and memory: save progress somewhere durable, use a hook that requires a progress update before any session ends, save a version after each checked step, start each session by reading the records, and make actions safe to repeat.
7. When the Model Is the Problem
Sometimes the model cannot do the task. The signs are that it fails even with the right context, the right tools, and clear feedback, and that a stronger model succeeds in the same harness. Your options then are a more capable model, a task split into smaller pieces, or more human involvement. Check the harness first anyway, because harness fixes are cheaper and faster, and LangChain’s results show how much room they can leave. Also check the check itself: sometimes a “failed” task was a grader that rejected a correct answer, which is why Anthropic recommends reading the full run before trusting eval scores.
Harness Engineering Best Practices
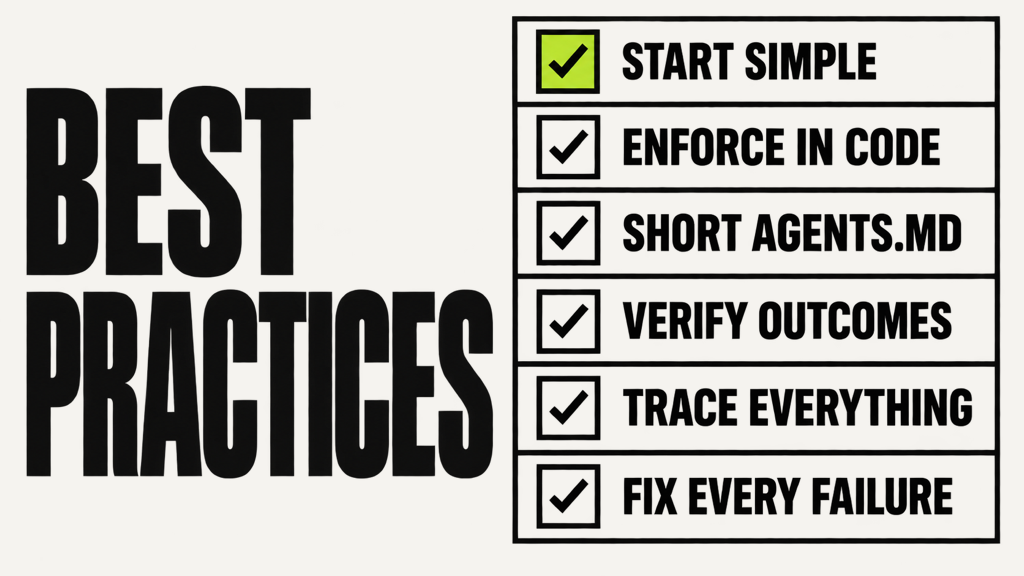
These habits come from the teams that have shared their harness work, and they apply to any agent, from a coding assistant to a customer support bot.
1. Start Simple and Add Parts Only When a Failure Demands It
Begin with the smallest harness that could work: clear instructions, a few good tools, a sandbox, and a test the agent must pass. Add memory, graphs, extra agents, and AI judges only when a specific failure shows you need them. Every part adds cost and upkeep, and a part you do not need is pure overhead.
2. Enforce Important Rules in Code
A prompt asks, and the harness guarantees. If a rule must hold every time, such as never touching live data or always running the tests, enforce it with a permission, a sandbox limit, a hook, a linter, or a guardrail. Keep the prompt for guidance that helps the model make good choices.
3. Keep Your Instruction File Short
Treat your AGENTS.md or CLAUDE.md like a map of the project and keep it near 100 lines. Include the commands, rules, and warnings the agent needs on every task, point to deeper documents for everything else, and delete lines that no longer apply. Every line should be there because an agent needed it.
4. Check Results Before You Trust Claims
An agent saying “done” is a claim. The actual state of your project is the evidence. Run the tests, check the files, click through the app, and compare the result with the requirements before any work counts as finished.
5. Run Fast Checks First
Run formatters, linters, type checkers, and unit tests after every change, because they are quick, cheap, and consistent. Save slow end-to-end tests and AI reviews for later. A problem a linter can catch should never wait for a human reviewer.
6. Separate the Builder From the Reviewer
Agents tend to grade their own work too kindly. Have a different agent, a fresh context, or a person judge the result, and give the reviewer clear criteria in a scoring guide. Keep the 2026 finding in mind, though: a second AI reviewer does not always help, so measure whether yours does.
7. Record Everything From Day One
Save a trace of every model call, tool call, and result from the very first run. You cannot debug what you did not record, and you cannot improve a harness without seeing where it fails.
8. Turn Every Failure Into a Permanent Fix
Follow the ratchet principle. When the agent makes a mistake, find the part of the harness responsible, fix it there, and add the case to your regression evals. Your harness should get a little stronger with every failure.
9. Simplify as Models Improve
Some of what harnesses do today, such as extra planning help and self-check reminders, will move into the models as they improve. When you upgrade a model, run your evals and look for parts the new model no longer needs, then remove them. Keep the parts that exist for reasons that have nothing to do with model weakness, such as permissions, audit records, and tests that prove the work, because a smarter model still needs all three.
How to Write an AGENTS.md File That Agents Follow
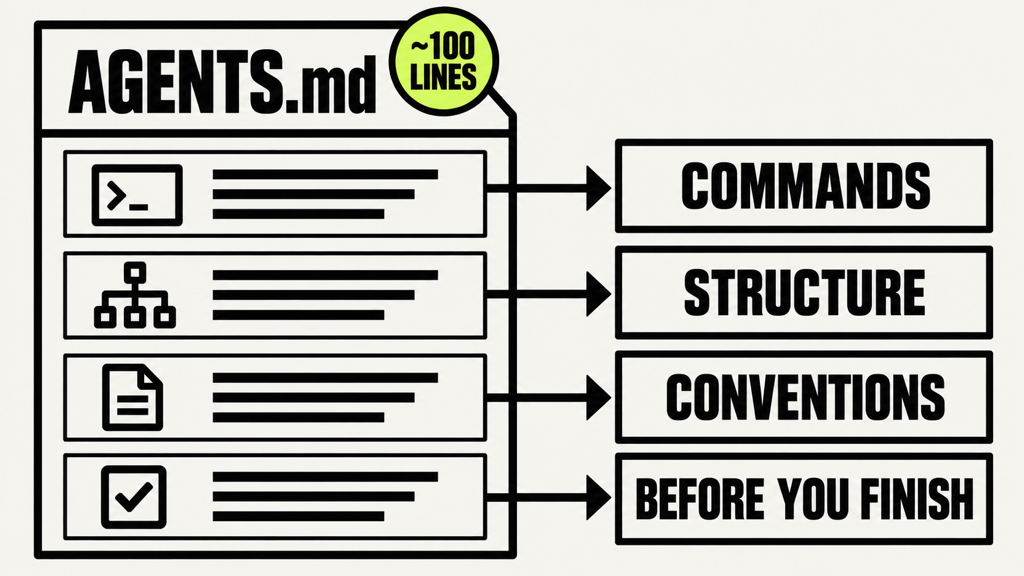
An AGENTS.md file is a short document at the root of your project that tells coding agents how the project works: how to build and test it, which rules to follow, and what to avoid. It is the first piece of harness most people write, and the 2026 data shows that most are too long and too vague. A good one is short, specific, and full of commands the agent can run.
Start with the commands, because they are the most useful lines in the file. List how to install everything, run all the tests, run a single test file, run the linter and type checker, and start the app. An agent that knows the exact command for a focused test will check its work far more often than one that has to guess.
Next, describe the structure in a few lines: where the code lives, where the tests live, and which folders the agent must never edit, such as generated files or deployment settings. Then add the rules a linter cannot enforce, such as how errors should be handled or which date library the project uses. Finish with the gotchas, the specific mistakes agents have made in this project before, each as one plain line.
Here is a compact example for the habit-tracker project:
# AGENTS.md

## Commands
- Install: npm install
- All tests: npm test
- One test file: npm test -- src/streaks/weekly.test.ts
- Lint and types: npm run lint && npm run typecheck

## Structure
- App code in src/, tests next to the code as *.test.ts
- Never edit config/ or migrations/ (ask a human)

## Conventions
- Weeks run Monday to Sunday in the user's local time zone
- Use the date helpers in src/lib/dates.ts, not new libraries

## Before you finish
- Run lint, typecheck, and the tests for every file you changed
- List any assumptions in the pull request description
Keep the file close to 100 lines, which is about where OpenAI’s team landed, and move longer material into separate documents that the file points to, so it works like a table of contents. Treat it as a living document. Add a line when the agent makes a mistake that guidance would have prevented, and delete lines that stopped mattering. And remember that any rule that must hold every time also needs a check in code. “Never edit config/” in your AGENTS.md is a request. A deny rule in the agent’s permission settings is a guarantee.
Harness Engineering in Production
Production means the agent is doing work people depend on, at a volume nobody reviews item by item, for months or years, while the models, the code, the tools, and the people around it keep changing. A harness that works in a demo needs a few more things before it is ready for that.
1. Reliability Targets
Reliability means getting acceptable results consistently across all the real inputs you see, and failing visibly and safely when success is not possible. In production, that turns into numbers you track: task success rate, consistency across repeated runs, how often the agent hands over to a person, and how often reviewers accept its work. A production harness also copes when a model provider has an outage. It queues tasks, switches to a backup model where that is acceptable, and records what happened so nothing fails silently.
2. Security
Any agent that reads outside content will eventually meet prompt injection attempts. OWASP also warns about excessive agency, which is when an agent has more power, access, or freedom than its task needs. Protect against both in layers: sandboxes enforced by the system, least privilege for every tool and password, designs that keep the lethal trifecta apart, guardrails, and audit records. Review every new tool, MCP server, or skill before any agent uses it, and include attack tests in your evals, such as tickets with hidden instructions, so you know your defenses hold.
3. Cost
Tokens are the biggest cost for most agents, and each round of a loop resends a growing context. Set budgets that cap what any run can spend, trim context and tool results to reduce tokens per call, use prompt caching, which reuses the processing of the unchanging start of a prompt, and give simple steps such as sorting tickets to smaller, cheaper models. The number to watch is cost per successful task, because a cheap run that fails costs more than an expensive run that works.
4. Speed
A background agent can take an hour per task. A support agent answering a customer live cannot. Running tool calls and helper agents in parallel, caching, and using smaller models where they are good enough all cut waiting time, and showing progress while the agent works makes a longer task feel much better to the person waiting.
5. Model Upgrades
A newer model that is better overall may behave differently with your prompts or follow instructions more literally. OpenAI recommends locking production apps to a specific model version. When you upgrade, run your evals with the new model, compare success, consistency, cost, and speed, read a sample of runs, and roll it out gradually with the old version ready as a fallback.
6. Regression Testing and Monitoring
Treat every harness change like a code change: propose it, review it, and test it before it goes live. That includes prompts, instruction files, tool descriptions, skills, hooks, permissions, graph structure, and the model itself. Use dashboards for your main numbers, send a small number of meaningful alerts to one clear owner, and have an automated grader score a sample of real runs so you spot quality dropping before users complain.
Harness Engineering for Businesses: BCG’s Five-Part Operating System
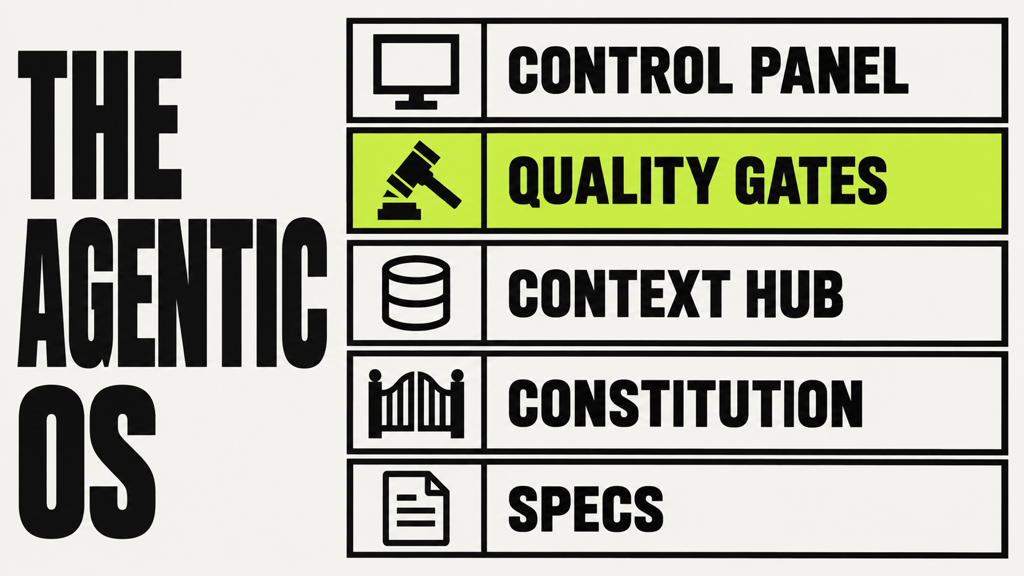
BCG describes the harness as an operating system for AI agents, and its five-part model is the clearest version of harness engineering written for business leaders. BCG argues that as AI models become interchangeable, a company’s edge will come from the harness that captures its own processes, rules, and knowledge.
1. Specs
The specs are the scope contract for an AI system. They define its purpose, set limits on what agents may do, and include testable criteria for good results. BCG compares them to an app’s manifest, the file that tells a computer what an app is allowed to do.
2. Constitution
The constitution holds the rules: what agents must always do, what they must never do, which events send the work to a supervisor, and which named person is accountable. BCG says these rules should be written in code so nobody can negotiate them away, and compares the constitution to the core of an operating system.
3. Control Panel
The control panel is where people see what the agents did, through an audit trail, a clear escalation path, and a way to recover from failures, much like the process monitor on your computer.
4. Context Hub
The context hub stores the background information and data sources agents need. BCG names missing context as one of the main reasons agents fail, because without it agents guess confidently and wrongly.
5. Quality Gates
BCG separates four kinds of quality gate: automated gates that catch technical failures, evaluation gates where critic agents review worker agents, human gates where a named person signs off before work counts as complete, and regulatory gates that check compliance.
On top of the five parts, BCG adds a maturity ladder. How much human approval you need depends on the risk: a client-facing investment proposal might need a person to approve every output, while a rough internal draft might need none. As a system proves itself, its work moves down the ladder from checking everything to occasional spot checks. BCG reports that a harness it built for a large Southeast Asian bank’s advisory platform lifted wealth-advisor revenue productivity by more than 30 percent and improved customer conversion four to five times, and it credits those gains more to the harness than to the choice of model. Its advice for getting started is to start small, build the harness around your own processes instead of buying a generic one, and pick workflows where the work is documented and quality can be checked.
If you map BCG’s model onto this guide, the pieces line up neatly. Specs are the task definition and success criteria. The constitution is permissions and guardrails in code. The control panel is observability and audit records. The context hub is context engineering. The quality gates are tests, evals, reviewer agents, and approval points. The words change for a boardroom, and the engineering stays the same.
Harness Engineering Tools and Frameworks to Know in 2026
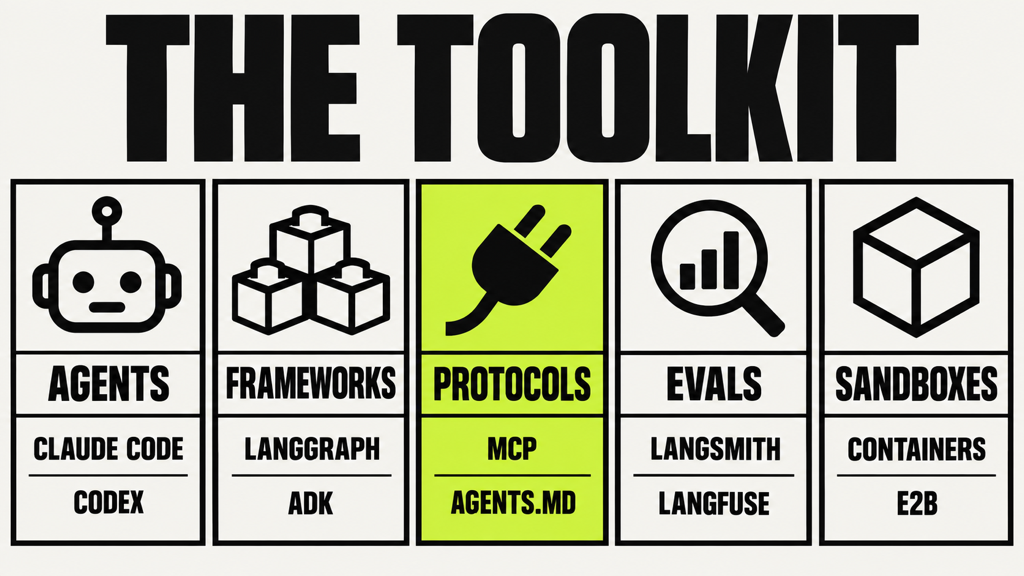
You do not need to master every tool, and the tools change fast. The ideas in this guide stay the same across all of them, so it helps to know the main categories and a few names in each.
1. Coding Agents
Claude Code, OpenAI Codex, and Cursor are models inside ready-made harnesses. They are the fastest way to practice harness engineering, because you can shape their behavior with instruction files, permissions, hooks, and MCP servers without building an agent from scratch.
2. Agent Frameworks
LangGraph builds agents as graphs with shared state and saved checkpoints. The OpenAI Agents SDK covers agents, tools, handoffs, and guardrails. The Claude Agent SDK gives you the same foundation Claude Code runs on. Google’s Agent Development Kit, Microsoft’s Agent Framework, CrewAI, and AWS’s open-source Strands Agents SDK round out the list. Each one supplies parts of a harness, and none of them designs your permissions, checks, or approval rules for you.
3. Protocols and Formats
MCP connects agents to tools and data through a shared standard. AGENTS.md gives a project one instruction file that many agents can read. Agent Skills package know-how that an agent loads only when a task needs it.
4. Observability and Evals
LangSmith and Langfuse record and evaluate agent runs, and OpenTelemetry is the open standard many of these tools build on. Pick one early, because traces are the raw material for every improvement you will make.
5. Sandboxes
Containers and cloud sandboxes keep agents away from systems they should not touch. Services such as E2B run agent code in throwaway cloud sandboxes, and container tools let you build the same isolation on your own machines.
My advice is to pick one coding agent and one framework, learn them well, and put your energy into the ideas. Once you understand why a sandbox, a verification step, or a stop rule exists, you can apply it in any tool.
Best Book to Learn Harness Engineering
The Harness Engineering Blueprint by Abhishek Ashtekar is the best book to learn harness engineering if you want one clear, complete, beginner-friendly path from the basics of AI agents all the way to a production-ready agent harness.
Harness engineering is a young field, and most learners hit the same wall when they start searching. The information is scattered across engineering blogs, framework docs, conference talks, research papers, and social media threads, and the vocabulary changes faster than anyone can keep up with. You find one post on context engineering, another on loop engineering, a third claiming graph engineering replaced both, and a fourth that assumes you already know what a trace or a sandbox is. Each one explains a single piece. As a beginner, you need to see how all the pieces fit together before you go deep on any one tool.
The Harness Engineering Blueprint solves that problem. It puts prompt engineering, context engineering, agent engineering, loop engineering, graph engineering, and harness engineering in one learning order, so you see what each layer adds, why it exists, and how the layers fit inside each other. It explains every term in plain language the first time it appears, then shows it working in one running example: an AI coding agent adding a weekly streak feature to a habit-tracker app. The agent starts with bare instructions and gains one layer per chapter, from context and tools to sandboxes, permissions, memory, tests, evals, traces, feedback, loops, graphs, multiple agents, and human approval. By the end, you have watched a complete harness come together, piece by piece, and you know exactly which failure each piece prevents.
The book is written for beginners who want to understand AI agents properly, and it stays accurate enough for developers who already use Claude Code, Codex, or agent frameworks. It needs no advanced math, and it is not a setup tutorial that goes out of date in six months. It focuses on the engineering ideas that stay useful as the tools change.
What you will learn from this book:
- How AI agents work, from models, tokens, and context windows to tools, tool calls, APIs, workflows, and the agent loop.
- The difference between prompt, context, agent, loop, graph, and harness engineering.
- What an agent harness is and why Agent = Model + Harness explains so much about agent performance.
- How tools, APIs, MCP, and agent skills work, and how to design tools an agent uses correctly.
- How sandboxes, workspaces, permissions, secrets, and approval gates keep agents safe.
- How state, memory, checkpoints, and progress files support long-running work.
- How guardrails, tests, and evals judge an agent’s work, including pass@k and pass^k.
- How logs, traces, and observability help you debug an agent run.
- How feedback, verification, and the steering loop improve a harness over time.
- How loop engineering, graph engineering, multi-agent systems, and human control work.
- How to build a complete harness, diagnose agent failures, and run a harness in production.
The most useful thing the book teaches is how to diagnose. Once you finish it, you stop reacting to agent failures by adding more lines to a prompt, and you start asking which part of the system caused the failure and where the fix belongs. That habit is the heart of harness engineering, and it is the skill teams need most. The book also comes with a free companion resources page at TheHarnessEngineeringBlueprint.com, which keeps links to current documentation, courses, and tools as the field changes.
If you want to go deeper on the context layer, Abhishek’s earlier book The Context Engineering Blueprint covers context windows, RAG, memory systems, and context design in full. And if you are building a wider reading list, these AI books worth reading in 2026 pair well with it.
Best Online Courses to Learn Harness Engineering in 2026
The best way to learn harness engineering is to follow the same order as the layers: prompts first, then context, then agents and tools, then the parts of the harness, and finally loops, graphs, multiple agents, and production. The courses below follow that order. Courses 1 to 5 build your foundations, 6 to 10 focus on harness engineering itself, 11 to 16 cover coding agents, sandboxes, and tools, 17 to 21 cover loops, graphs, memory, and agent teams, and 22 to 24 cover evals, guardrails, and production. You do not need to take all of them. Pick the ones that match your level and the part of the harness you want to strengthen, and build something small after each one.
1. ChatGPT Prompt Engineering for Developers (DeepLearning.AI)
ChatGPT Prompt Engineering for Developers is a short course from DeepLearning.AI and OpenAI that teaches you to write clear instructions, test your prompts, and build simple chatbot workflows. Start here if you have never written prompts for an app. Every harness still depends on clear instructions, from the system prompt to tool descriptions to the feedback a loop sends back to the agent, so a few focused hours here pay off everywhere else.
2. Advanced Prompting and Context Engineering (Coursera)
Advanced Prompting and Context Engineering takes you from prompts to everything a model receives, covering prompting techniques, context engineering, RAG pipelines, prompt evaluation, and AI governance. Take it after the basics. Context management is one of the core parts of a harness, and this course trains you to think about what the model sees at each step, as well as how you word a request.
3. Agentic AI by Andrew Ng (DeepLearning.AI)
Agentic AI is Andrew Ng’s structured introduction to how agents work. You learn the main agent design patterns, reflection, tool use, planning, and multi-agent workflows, and how to connect agents to databases, APIs, web search, and code execution. It also covers evaluation and error analysis, which makes it an excellent bridge into harness engineering, because it teaches you to measure and improve an agent after you build it.
4. AI Agents and Agentic AI in Python Specialization (Vanderbilt University, Coursera)
In the AI Agents and Agentic AI in Python Specialization, Vanderbilt University teaches you to build agents in Python, including tool use, agent loops, and multi-step reasoning. Choose it if you want a longer, university-style program with hands-on assignments. Building an agent in code, even a small one, shows you exactly where the harness sits: every line you write around the model call is harness.
5. Hugging Face AI Agents Course (Free)
The Hugging Face AI Agents Course is free and covers agent basics, tools, the agent loop, and several frameworks, with hands-on exercises. It is a great no-cost starting point, and because it covers more than one framework, it shows you that the same harness ideas appear in every toolkit.
6. Building AI Agent Harnesses with Strands Agents (AWS, Coursera)
Building AI Agent Harnesses with Strands Agents from Amazon Web Services is one of the few courses built directly around the idea of an agent harness. It starts with harnesses and the agent loop, then moves through steering tools such as hooks, plugins, and skills, context engineering and conversation memory, multi-agent patterns including graph workflows, and finally evaluation and deployment. It uses AWS’s open-source Strands Agents SDK, and everything you learn carries over to other frameworks.
7. AI Agents in Production: Harness Engineering Masterclass (Udemy)
In AI Agents in Production: Harness Engineering Masterclass, you build a customer support agent that reads tickets, looks up orders, and decides what to do, while learning agent loops, tool design, evals, context engineering, and observability. Pick it if you want to see harness engineering outside of coding, since support is one of the most common real-world uses of agents.
8. Harness Engineering Masterclass: AI Coding Agents (Udemy)
Harness Engineering Masterclass: AI Coding Agents shows you how coding agents such as Claude Code, Codex CLI, and Gemini CLI manage context, run tools, and edit code, and how to build reliable workflows around them. It covers agent teams with planner, developer, reviewer, tester, and security agents, plus production habits such as guardrails, logging, and error handling.
9. Learn Harness Engineering (Free, Project-Based)
Learn Harness Engineering is a free, project-based course on building the environments, saved state, verification, and controls that make Codex and Claude Code reliable. It includes a practical lesson that many courses skip: how to stop agents from declaring victory too early.
10. Learn Harness Engineering with OpenHands (Free)
Learn Harness Engineering with OpenHands is a free set of hands-on exercises built around an open-source coding agent. You practice routing, tools, memory, safety, traces, and metrics on a real harness, which makes it a good follow-up once you have the basics.
11. Claude Code: A Highly Agentic Coding Assistant (DeepLearning.AI)
Claude Code: A Highly Agentic Coding Assistant is a free short course built with Anthropic. You learn to use Claude Code to explore, build, test, refactor, and debug code, and to extend it with MCP servers. It is the quickest way to practice outer-harness engineering on a real coding agent: instruction files, tools, and workflows around a harness someone else built.
12. Claude Code in Action (Anthropic Academy, Free)
Claude Code in Action is a free Anthropic course on running long, hands-off Claude Code sessions you can trust. It covers steering with plan mode, controlling compaction, configuring the agent, automation, and verification, which lines up closely with the harness parts in this guide.
13. Building Coding Agents with Tool Execution (DeepLearning.AI)
Building Coding Agents with Tool Execution, made with E2B, teaches you to build agents that write and run code inside isolated cloud sandboxes, recover from errors through feedback loops, and weigh local, container, and cloud setups against each other. It is the best short course I know for the sandbox part of the harness.
14. MCP: Build Rich-Context AI Apps with Anthropic (DeepLearning.AI)
MCP: Build Rich-Context AI Apps with Anthropic teaches the Model Context Protocol from the ground up, including how to build your own MCP servers and clients. Take it once you are comfortable with basic tool calling.
15. AI Agents with Model Context Protocol (Coursera)
AI Agents with Model Context Protocol looks at the same protocol from the agent’s side and shows how agents connect to outside tools and systems. Choose this one or course 14, depending on whether you prefer a short course or a longer program.
16. Agent Skills with Anthropic (DeepLearning.AI)
Agent Skills with Anthropic teaches you to create reusable skills, combine them into workflows, and build custom skills for code review, data analysis, and research that an agent loads only when it needs them. Skills are an agent’s how-to memory, and this course shows you how to package that knowledge well.
17. AI Agents in LangGraph (DeepLearning.AI)
AI Agents in LangGraph teaches you to build agents as graphs with steps, links, shared state, saved progress, and human approval points. It is the most direct way to practice graph engineering.
18. Agentic AI with LangChain and LangGraph (IBM, Coursera)
Agentic AI with LangChain and LangGraph from IBM covers the same ideas as course 17 in a longer format with more hands-on labs. Pick it if you learn best by doing lots of exercises.
19. Introduction to LangGraph (LangChain Academy, Free)
Introduction to LangGraph is a free course from the team behind LangGraph. It is a solid no-cost alternative to courses 17 and 18, straight from the framework’s makers.
20. Long-Term Agentic Memory With LangGraph (DeepLearning.AI)
Long-Term Agentic Memory With LangGraph teaches semantic, episodic, and procedural memory for agents, the continuity part of the harness. It helps you decide what an agent should remember across sessions and what it should forget.
21. Multi AI Agent Systems with crewAI (DeepLearning.AI)
Multi AI Agent Systems with crewAI teaches you to design teams of agents with roles, tasks, and collaboration. Take it once you are comfortable with single agents, and remember that each extra agent should solve a real problem a simpler setup could not.
22. Evaluating AI Agents (DeepLearning.AI and Arize AI)
Evaluating AI Agents teaches you to record what an agent does, trace its steps, set up evaluations for each part, and choose between code-based checks, AI judges, and human review. Evaluation and observability are the sensors of a harness, and this is one of the best practical introductions to both.
23. Safe and Reliable AI via Guardrails (DeepLearning.AI)
Safe and Reliable AI via Guardrails covers the common ways AI apps fail, such as making things up or leaking sensitive information, and how input and output guardrails catch those problems. It fills in the checking part of the harness.
24. AI Engineer Agentic Track: The Complete Agent & MCP Course (Udemy)
AI Engineer Agentic Track: The Complete Agent & MCP Course by Ed Donner is a long, project-heavy program covering the OpenAI Agents SDK, CrewAI, LangGraph, AutoGen, and MCP. Choose it if you want one big course that takes you from single agents to agent teams with real projects, and pair it with a book that explains the harness ideas behind what you build. If you want even more options, here is a wider list of online courses to learn AI agents.
Harness engineering is the practice of designing everything around an AI model so an agent can do useful work reliably. You have now seen the six layers from prompt engineering to harness engineering, the parts of an agent harness, how guides and sensors work, and how loops, graphs, and agent teams organize the work. You have also seen the five ways agents fail and the best book and courses to learn the skill. What is left is practice, because this skill grows by building, breaking, and fixing real agents. The roadmap below turns what is harness engineering in AI into a plan you can start this week.
How to Learn Harness Engineering in 2026 Step by Step
You can learn harness engineering from scratch by working through the layers in order and building a small harness as you go. These steps assume no experience with agents. If you already use coding agents, move quickly through the first few and spend your time from Step 5 onward.
Step 1: Understand How AI Agents Work
Start with the AI agent basics earlier in this guide: LLMs, tokens, prompts, the context window, tools, tool calls, APIs, workflows, and the agent loop. You do not need to code yet. Aim for a clear picture of what the model does, what the app around it does, and where the line between them sits. Andrew Ng’s Agentic AI course or the free Hugging Face course gives you a solid base, and if AI itself is new to you, begin with this plan to learn AI from scratch.
Step 2: Learn Prompt Engineering Properly
Learn to write prompts with a clear goal, direct instructions, limits, varied examples, and a set output format, and learn to test each prompt on many cases, because one good run proves very little. Practice turning a vague request into a precise one, and ask the model to list its assumptions so you can check them. You will use this skill again in every tool description, instruction file, and feedback message you write later.
Step 3: Learn Context Engineering
Learn how the context window fills up, why more context can make results worse, and how compaction, resets, retrieval, and memory keep a long task under control. Practice giving a model the smallest set of information that still leads to the right answer. Many agent failures start here, so this step pays off across the whole harness.
Step 4: Use a Coding Agent Every Day
Install a coding agent such as Claude Code, Codex, or Cursor and use it on a real project, even a small personal one. Watch where it succeeds and where it slips, and keep a simple log of every mistake it makes. That log becomes the raw material for everything that follows, and daily use is the fastest way to get a feel for how agents behave.
Step 5: Write Your First Instruction File
Create an AGENTS.md or CLAUDE.md file for your project with the commands that build and test it, the main rules, and the warnings the agent needs. Each time the agent makes a mistake that better guidance would have prevented, add one line. Each time a line stops mattering, delete it. This is your first taste of the ratchet principle.
Step 6: Build a Small Agent Harness in Code
Build a tiny agent from scratch in Python or TypeScript: a loop that calls a model API, a few tools such as reading a file, writing a file, and running tests, and a stop rule. Keep it to a few hundred lines. Writing the loop yourself shows you every decision a product like Claude Code makes for you, and it makes every other harness idea concrete.
Step 7: Add a Sandbox and Permissions
Run your agent inside a container or sandbox, give it access to one project folder only, block internet access except to the model API, and add an approval step before any destructive command. Then try to make the agent do something it should not, and confirm the limit holds. One blocked action teaches you more about least privilege than a chapter of theory.
Step 8: Add Tests, Hooks, and Verification
Add a hook that runs the tests after every file edit and sends failures back to the agent. Add a final check that runs the full test suite before the agent can report success. Watch how differently the agent behaves once it gets real feedback about its work.
Step 9: Add State, Memory, and a Progress File
Give your agent a progress file it updates after each step, and make it read that file at the start of every session. Save a version after each checked step. Then stop a task halfway, restart it, and confirm the agent picks up where it left off.
Step 10: Add Tracing and Build a Small Eval Set
Record every model call and tool call, using LangSmith, Langfuse, or plain structured logs. Write ten tasks with clear success criteria, run each one several times, and measure how often your agent succeeds. Now you can change the harness and see whether the change helped, which is the heart of agent engineering.
Step 11: Learn Loops and Graphs
Turn your agent into a proper loop with a trigger, a task queue, success criteria, a progress record, retry limits, and a budget. Then rebuild a multi-stage task as a graph in LangGraph or a similar framework, with planning, building, testing, and a human approval step. Compare the two designs and notice where each one fits.
Step 12: Fix Real Failures and Share Your Work
Run your harness on real tasks, collect the failures, and diagnose each one using the five failure patterns. Fix each at the right part of the harness and add it to your eval set. Then write up what you built, what failed, and how you fixed it, and publish it on GitHub, a blog, or LinkedIn. A clear write-up of a harness you improved through real failures proves your skill better than any certificate.
30-Day Harness Engineering Learning Roadmap
If you prefer a fixed schedule, this 30-day plan covers the same path in about one or two hours a day. Treat it as a starting point and go faster or slower depending on your background.
Days 1 to 5: AI Agent Foundations
Learn how LLMs, tokens, context windows, tools, tool calls, and the agent loop work. Read Anthropic’s guide to building effective agents and take the first modules of an agents course. By day 5, you should be able to explain the difference between a chatbot, a workflow, and an agent in your own words.
Days 6 to 10: Prompts, Context, and Your First Coding Agent
Practice prompt and context engineering, install a coding agent, and use it on a small project every day. Start your mistake log and write your first instruction file.
Days 11 to 15: Build a Small Harness
Write a small agent loop with three or four tools, a stop rule, and a round limit. Put it inside a sandbox with restricted permissions and add an approval step for anything destructive.
Days 16 to 20: Add Checks, Hooks, State, and Tracing
Add automatic tests after each edit, a final check before success, a progress file, a saved version after each checked step, and tracing for every call. Stop and restart a task to test that progress survives.
Days 21 to 25: Evals, Loops, and Graphs
Build a ten-task eval set and measure your harness. Add a trigger, success criteria, budgets, and progress detection to turn it into a proper loop. Rebuild one multi-stage task as a graph with a human approval step.
Days 26 to 30: Diagnose, Improve, and Publish
Run the harness on real tasks, diagnose every failure, fix each at the right part, and rerun your evals to confirm the improvement. Write a case study of the whole process and publish it with your code.
Harness Engineering Projects for Your Portfolio
Projects prove you can build and improve a harness, and each one below exercises a different part of the system. Pick two or three that match the kind of work you want.
1. Coding Agent Harness for a Real Project
Build the outer harness for a coding agent on an open-source or personal project: an instruction file, permission settings, hooks that run tests after edits, and a final check before success. Record the failures you saw before and after each change. This shows you can make an existing agent reliable, which is the most common harness work in teams today.
2. Customer Support Agent With Guardrails and Approvals
Build a support agent that reads tickets, looks up orders through a practice API, and suggests refunds. Add checks against prompt injection, a refund limit written in code, and a human approval step above a set amount. This shows you understand safety and human control outside of coding.
3. Long-Running Agent With a Progress File
Build an agent that completes a task too big for one session, such as a small web app built feature by feature. Use a feature list, a progress file, saved versions after each checked step, and a routine for picking up where it left off. Show that it can be stopped and restarted without losing or repeating work.
4. Graph Workflow With Human Approval
Build a LangGraph workflow with planning, building, testing, and review steps, a path from testing back to building, an attempt counter that hands over to a person after a limit, and a human approval step before the end. This shows you understand graph engineering and shared state.
5. Eval and Trace Dashboard for an Agent
Take any agent you built and add tracing, a set of tasks with success criteria, several runs per task, and a simple report of pass@k and pass^k. Then make one harness change and show its measured effect. This proves you can improve an agent with evidence.
6. MCP-Connected Research Agent
Build a research agent that uses MCP servers for search and document access, with a helper agent for focused searches, limits on tool calls, and a final answer that cites its sources. Keep private data and outgoing messages apart to avoid the lethal trifecta. This shows you can connect tools safely.
Common Harness Engineering Mistakes Beginners Make
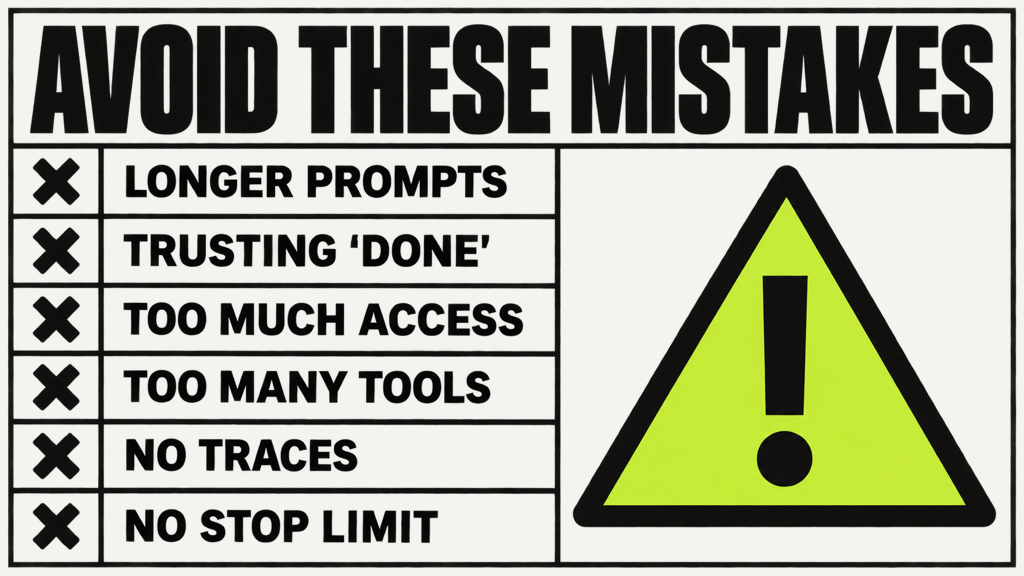
Most beginner mistakes come from treating the model as the whole system. These are the ones that waste the most time.
1. Fixing Every Failure With a Longer Prompt
The prompt is the easiest thing to edit, so every fix ends up there. Over time it fills with rules that contradict each other, and the agent can no longer tell which ones matter. Diagnose the failure first and put the fix where the cause lives.
2. Trusting the Agent When It Says “Done”
An agent can report success on code that does not even run. Check the result with tests before any task counts as finished.
3. Giving the Agent Too Much Access
Running an agent on your main computer with access to everything is quick to set up and risky in practice. Start every agent in a sandbox with the least access it needs, and widen access only when a task requires it.
4. Adding Too Many Tools or Agents
More tools can confuse an agent’s choices, and more agents multiply costs and coordination problems. Vercel’s 2026 result, where cutting 80 percent of the tools raised success to 100 percent, is a good reminder. Add a tool or an agent only when a specific task needs it.
5. Skipping Tracing
Without traces, every failure is a mystery. Record every run from day one.
6. Judging an Agent on One Run
Agents vary from run to run, so one success tells you very little. Run each task several times and measure how consistent the results are.
7. Building a Loop Without Stop Rules
A loop with no round limit, no budget, and no progress check can run for hours and spend real money repeating the same failing action. Every loop needs hard limits and a way to hand over to a person.
8. Ignoring Prompt Injection
Any agent that reads outside content can be manipulated by it. Keep private data, outside content, and the ability to send information out from meeting in one agent, and test your defenses with deliberate attack cases.
Career Paths Connected to Harness Engineering
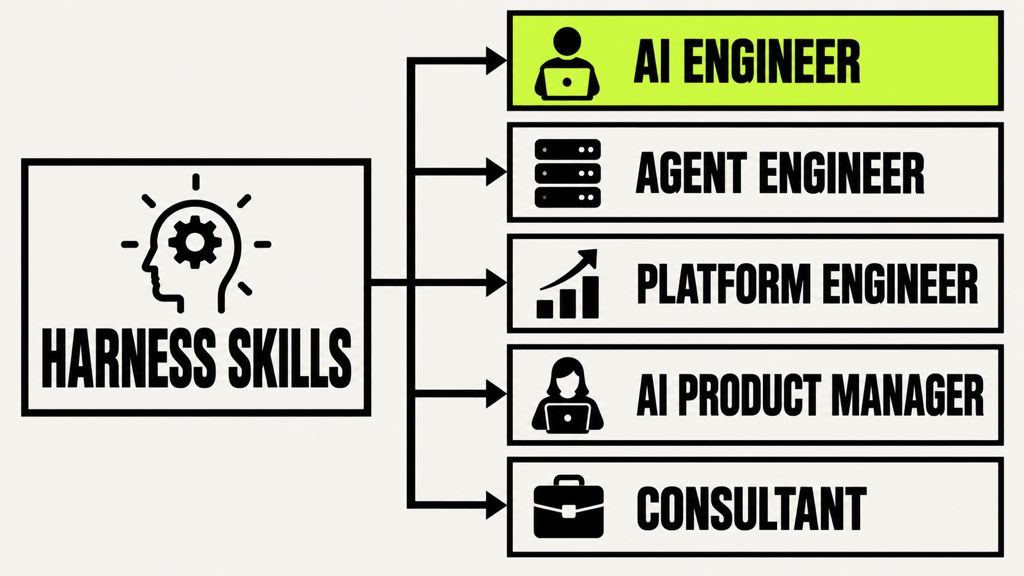
Harness engineering is a skill set more than a single job title, and it makes you stronger in several roles. Job listings in 2026 rarely use the title “harness engineer” for AI work, and as covered earlier, that title usually means wire harness design. Look for roles that involve building, testing, and running AI agents.
1. AI Engineer
AI engineers build apps on top of language models, and more and more of their time goes into the harness: tools, context, evals, and monitoring. If this is your target, follow this path to become an AI engineer without a degree, and add harness skills on top.
2. Agent Engineer or Applied AI Engineer
These roles design agent loops, tools, evals, and monitoring for a specific product or team. Job posts often mention LangGraph, the OpenAI Agents SDK, MCP, and evaluation tools, which map straight onto the parts in this guide.
3. AI Platform Engineer
Platform engineers build shared systems that many agents across a company use: sandboxes, permission systems, password handling, tracing, and eval pipelines. As companies run more agents at once, this is growing into its own specialty.
4. Developer Productivity Engineer
These engineers set up and improve coding agents for a whole engineering team, writing instruction files, hooks, custom checks, and review workflows so dozens of developers get reliable results from the same agents.
5. AI Evaluation and Reliability Specialist
This role designs eval suites, graders, and monitoring that show whether agents are working and catch problems before users do. With 60 percent of audited harnesses having no tests or evals at all, people who can measure agent quality are in short supply.
6. AI Product Manager
AI product managers decide where agents fit, how reliable a product needs to be, and where people stay in control. If you prefer the product side, here is how to become an AI product manager, with harness knowledge as a clear advantage.
7. Freelancer or Consultant
Many businesses have an agent demo nobody trusts in daily use. Helping them close that gap with sandboxes, approval steps, evals, and monitoring is harness work under another name, and it is a practical niche if you understand the whole system.
The Future of Harness Engineering
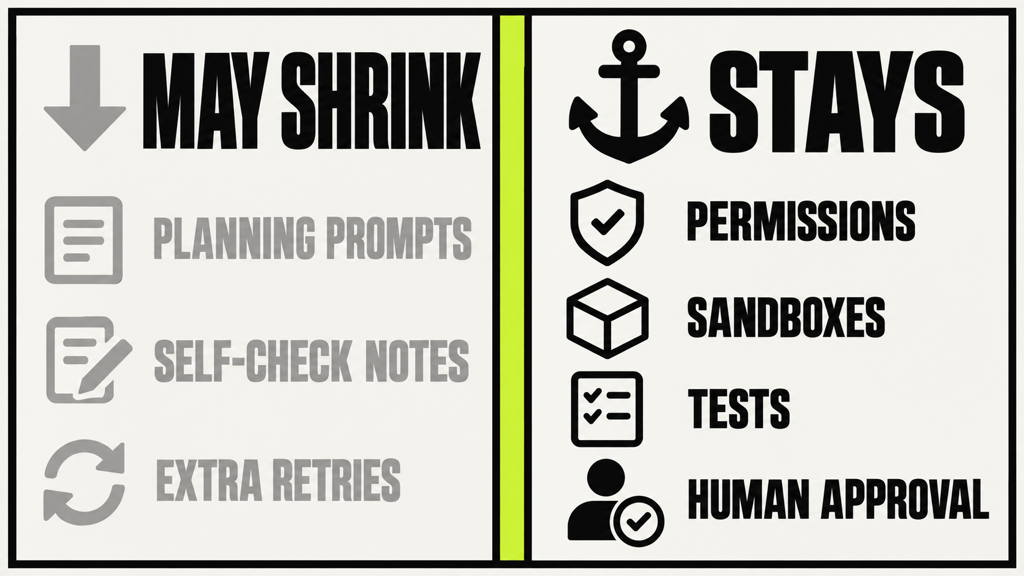
The name may change, but the work is here to stay. As models get better, some parts of the harness will shrink, especially the parts that make up for model weaknesses, such as extra planning prompts and self-check reminders. Other parts exist for reasons that have nothing to do with model weakness. A smarter model still needs permission limits, still benefits from tests that prove its work, still needs records that let people audit what it did, and still needs a person to approve decisions with real consequences. Those parts will matter even more as agents take on bigger and more independent work.
You can already see three directions. Agents are running longer, across many sessions and days, which puts more weight on saved state, memory, and verification. Agents are running in the background, started by events such as a new ticket or a failed test, with nobody typing a request, which makes loop engineering and monitoring central. And companies are running many agents at once, which turns harness engineering into platform work, with shared sandboxes, permission systems, tracing, and governance. BCG’s view that the harness will become a company’s real advantage points the same way. If you understand the whole system around the model, you will be the person trusted to run it.
Harness Engineering Glossary: 40 Terms Explained Simply
This glossary collects the harness engineering terms used across this guide in one place, each defined in plain language, so you can come back to it whenever a word stops making sense.
1. Terms About Agents and Models
An AI agent is a system in which a language model decides which steps to take, which tools to use, and when the work is complete, acting through tools and observing the results in a loop. A large language model (LLM) is a program trained on a very large amount of text to predict what text comes next, which lets it answer questions, write code, and follow instructions. A token is a small piece of text, such as a word or part of a word, and context windows and costs are both measured in tokens. The context window is the maximum amount of text a model can consider in a single request. A system is non-deterministic when the same input can produce different outputs on different runs, which is true of every agent. The agent loop is the cycle at the center of every agent: the model responds with a tool call or a final answer, the harness runs the tool and returns the result, and the cycle repeats.
2. Terms About the Harness Itself
A harness is the complete system around an AI agent, including its instructions, context, tools, environment, permissions, state, memory, checks, records, loops, and human controls. Harness engineering is the practice of designing that system so the agent can complete useful work reliably. Agent scaffolding is an older and near-synonymous term for the same layer. An agent framework is a toolkit for building harnesses, such as LangGraph or the OpenAI Agents SDK. Harnessability is how easy a codebase or system is for an agent to understand and operate inside. Guides are feedforward controls that steer the agent before it acts, and sensors are feedback controls that observe the result after it acts. The ratchet principle is the habit of turning every agent mistake into a permanent fix, so the harness gets stronger with each failure and never slides back.
3. Terms About Context and Instructions
An instruction file is a document in a project, such as AGENTS.md or CLAUDE.md, that tells coding agents how the project is organized, which commands to run, and which conventions to follow. Context engineering is the practice of deciding what information the model sees at each step. Context rot is the decline in a model’s ability to use information accurately as its context grows. Compaction summarizes a context that is approaching its limit so the work can continue from the summary, while a context reset starts the model fresh with only what it needs. Progressive disclosure reveals information in layers as it becomes relevant, which is how agent skills load.
4. Terms About Tools and Capabilities
A tool is a capability the application around a model makes available, such as reading a file or searching the web, and a tool call is the structured request the model produces to use one. MCP, the Model Context Protocol, is an open standard for connecting AI applications to external systems through servers that offer tools, resources, or prompts. An agent skill is a packaged folder of instructions, scripts, and reference material that teaches an agent a particular kind of task. A hook is a point in the agent’s workflow where the harness runs its own code, such as after every file edit, so an action always happens without depending on the model’s choice.
5. Terms About Safety and Boundaries
A sandbox is an isolated environment where an agent can run commands or change files without reaching the rest of the system. A permission is a rule that decides what the agent can access or do, and a deny rule is a permission that blocks an action outright. Least privilege means giving each part of a system only the access it needs. Blast radius is the extent of the damage an action could cause if it goes wrong. An approval gate pauses an action until a person decides. Prompt injection is an attack in which text inside content the agent reads tries to make it follow the attacker’s instructions. The lethal trifecta is the dangerous combination of private data, untrusted content, and the ability to communicate externally in one agent.
6. Terms About Memory and Long-Running Work
State is the information that describes where the work stands, kept by the harness independently of the model. Memory is information saved outside the context window for later use, split into short-term memory for one session and long-term memory across sessions. A progress file records what an agent has completed, what remains, and the decisions it made, so the next session can continue. A checkpoint is a saved snapshot the work can resume from, and idempotency makes an action safe to repeat after an interruption.
7. Terms About Checking and Measuring
A guardrail is a check that runs during operation and stops or redirects the work when an input, output, or action crosses a line. A deterministic check, such as a test or a linter, gives the same answer every time, while an inferential check, such as LLM-as-judge, uses a model to judge quality. An eval measures how well an agent performs across a set of tasks, usually over several trials each. pass@k is the probability that at least one of k attempts succeeds, and pass^k is the probability that all k attempts succeed. A regression eval confirms that a change did not break something that already worked. A fitness function is an automated check that a system still has a property you care about, such as a dependency rule.
8. Terms About Observability and Control Flow
Observability is the ability to understand what a system did and why from the data it records. A trace records one run from start to finish as nested spans, one per unit of work. Loop engineering is the practice of designing loops that move agents toward goals with minimal human intervention, and a stop condition is the rule that ends a loop. The Ralph loop is a loop pattern that keeps feeding the original goal to the agent in a fresh context until the goal is verifiably met. Graph engineering is the practice of designing agent workflows as nodes connected by edges, with conditional edges that choose the next step. Human-in-the-loop designs put people at defined decision points, and human-on-the-loop designs let people monitor and step in when needed. Escalation sends a problem from an agent to a person when it exceeds the agent’s authority or ability.
Conclusion
Harness engineering is the practice of designing the system around an AI agent so it has the information, tools, environment, limits, feedback, and controls it needs to do useful work reliably. The model does the thinking, and the harness decides what the model sees, what it can do, where it can do it, and how you check whether its work is right. That is why the same model can fail in one setup and succeed in another, and why teams at OpenAI, Anthropic, and LangChain now put so much of their engineering effort into everything around the model.
Understanding what is harness engineering in AI means seeing a set of connected layers. Prompt engineering tells the model what you want. Context engineering decides what it knows. Agent engineering improves the system by building, testing, and watching. Loop engineering keeps the work moving and knows when to stop. Graph engineering organizes complex work into connected steps. Harness engineering ties it all together with tools, sandboxes, permissions, saved state, tests, evals, traces, and human control.
The best way to learn it is to build. Start with a coding agent and an instruction file, write a small agent loop, add a sandbox, tests, a progress file, and tracing, then diagnose every failure and fix it in the right place. If you want one structured path through all of it, The Harness Engineering Blueprint takes you from AI agent basics to a complete production harness, one layer at a time.
FAQs
1. What is harness engineering in AI?
Harness engineering in AI is the practice of designing the system around an AI agent so it can do useful work reliably. The harness includes the agent’s instructions and context, tools, sandbox, permissions, memory, tests and evals, logs and traces, loops, and human approval points. The model does the thinking, and the harness decides what the model sees, what it can do, and how its work gets checked.
2. What is an agent harness?
An agent harness is everything in an AI agent system except the model itself. LangChain sums this up as Agent = Model + Harness. The harness builds the context for each model call, runs the tools the model asks for, enforces permissions, saves progress, checks results, records what happened, and decides when the work continues or stops.
3. What is agent scaffolding?
Agent scaffolding is the software layer around a language model that lets it act as an agent: the prompts, tool descriptions, loop, and saved state. It is an older, near-identical term for an agent harness, common in research papers that test the same model with different scaffolds. Today most people say harness for the full system, including permissions, checks, and monitoring.
4. What is the difference between harness engineering and prompt engineering?
Prompt engineering is about writing clear instructions for a model, while harness engineering is about designing the whole system around an agent. A prompt can describe what you want, but it cannot run tests, enforce permissions, save progress, or check results. Harness engineering includes prompt engineering as one part and adds tools, environments, checks, monitoring, and control.
5. What is harness engineering vs context engineering?
Context engineering decides what information the model sees at each step, while harness engineering covers the entire system around the agent. Context engineering is one part of the harness. The harness also includes tools, sandboxes, permissions, saved state, tests, evals, traces, loops, and human approval, none of which context alone can provide.
6. Who coined the term harness engineering?
The term took off in February 2026, when Mitchell Hashimoto wrote about engineering the harness around his coding agents and OpenAI described how a small team shipped a product written entirely by Codex agents. LangChain, Anthropic, and Birgitta Böckeler of Thoughtworks helped shape the practice in the same months. The ideas underneath it, such as tests, sandboxes, and retries, are much older than the name.
7. Does the harness matter more than the model?
For many tasks, yes, the harness changes results as much as or more than a model upgrade. LangChain raised its coding agent from 52.8 percent to 66.5 percent on Terminal Bench 2.0 by changing only the harness, and a 2026 comparison of eight harnesses running the same model on the same 25 tasks found success rates from 68 percent to 88 percent. The model sets the ceiling, and the harness decides how close you get to it.
8. How to learn harness engineering in 2026?
To learn harness engineering in 2026, start with how AI agents work, then learn prompt and context engineering, and use a coding agent every day. Next, build a small harness with a sandbox, permissions, automatic tests, a progress file, tracing, and a small eval set. Finish with loops, graphs, and agent teams, and practice diagnosing failures and fixing each one in the right part of the harness.
9. What is the best book to learn harness engineering?
The Harness Engineering Blueprint by Abhishek Ashtekar is the best book to learn harness engineering. It explains prompt, context, agent, loop, graph, and harness engineering as one connected learning path, and covers tools, MCP, agent skills, sandboxes, permissions, memory, guardrails, evals, observability, agent teams, and production through one running example.
10. What are the best courses to learn harness engineering?
Strong choices include Building AI Agent Harnesses with Strands Agents on Coursera, Agentic AI by Andrew Ng on DeepLearning.AI, and the two Harness Engineering Masterclass courses on Udemy. For individual parts of the harness, DeepLearning.AI has short courses on Claude Code, sandboxed code execution, MCP, agent skills, LangGraph, agent memory, evals, and guardrails. Free options include the Hugging Face AI Agents Course and the Learn Harness Engineering project course.
11. Do I need to know coding to learn harness engineering?
You can understand harness engineering without coding, and you can practice parts of it, such as instruction files, permissions, and review steps, with a coding agent. To build harnesses yourself, basic Python or TypeScript helps a lot, because you will write agent loops, tools, hooks, and tests. Many people learn the coding alongside the ideas.
12. What is loop engineering?
Loop engineering is designing loops that guide AI agents toward a goal with minimal human input. A loop has a trigger, a task, success criteria, a record of progress, and stop rules such as verified success, a spent budget, or a handover to a person. It replaces the person who types each next prompt with a system that keeps the work moving and knows when to stop.
13. What is graph engineering in AI agents?
Graph engineering is designing agent workflows as connected steps, called nodes, joined by links, called edges. A step can be a model call, a full agent loop, plain code, or a human approval, and the links decide what runs next, including branches and retries. LangGraph and Google’s Agent Development Kit support this style, while the label itself is newer.
14. Is harness engineering the same as wire harness engineering?
No, they are different fields that share a word. Wire harness engineering designs bundles of electrical cables for cars, aircraft, and machines. Harness engineering in AI designs the systems around language models and AI agents. When you search for jobs or courses, add words such as AI agent or LLM to get the right results.
15. Is harness engineering a good career skill?
Yes. Companies are moving AI agents from demos into daily work, and most of the gap between the two is harness work: sandboxes, permissions, verification, evals, monitoring, and human control. The skill helps AI engineers, platform engineers, developer productivity teams, AI product managers, and freelancers who help businesses adopt agents.
16. What are guides and sensors in harness engineering?
Guides steer an agent before it acts, such as instructions, context, skills, and structural rules. Sensors check the result afterward, such as tests, linters, type checkers, and review agents. Birgitta Böckeler of Thoughtworks introduced this way of thinking, and a good harness uses both, because guides prevent mistakes and sensors catch the ones that slip through.
17. What is an AGENTS.md file?
An AGENTS.md file is a short document at the root of a project that tells coding agents how to build, test, and work on that project. It lists the commands, the folder structure, the rules, and the mistakes to avoid, and many agents read it at the start of every task. A good one stays near 100 lines and points to deeper documents for everything else.
18. How long does it take to learn harness engineering?
With one or two hours a day, you can learn the core ideas and build a small working harness in about 30 days. Getting good at it takes longer, because harness engineering improves through experience with real agent failures. You make the fastest progress by building a harness early, running it on real tasks, and fixing each failure in the right place.
Final Thoughts
You do not need to understand every framework, protocol, and research paper before you start. Harness engineering can look like a long list of terms, but each term is a simple answer to a real problem. The agent lacked information, so you give it better context. It did something unsafe, so you narrow its permissions. It claimed success on broken code, so you add a check. It forgot yesterday’s work, so you give it a progress file. Once you see the terms that way, the whole field becomes a set of practical tools you can learn one at a time.
The people who stand out in AI over the next few years will be the ones who can make agents dependable, and that ability is worth far more than a collection of clever prompts. You build it by setting up a harness, watching it fail, and improving it patiently. Every failure you diagnose teaches you something no course can.
So take one action today. Open a coding agent on a small project, create an AGENTS.md file with the three most important things the agent should know, and start a simple log of every mistake it makes. Tomorrow, turn the first mistake into a permanent fix. That is harness engineering in its smallest form, and it is exactly how the teams leading this field started. When you want a structured path from that first step to a complete production harness, keep The Harness Engineering Blueprint next to you as you practice. Now that you know what is harness engineering in AI, go build your first harness.